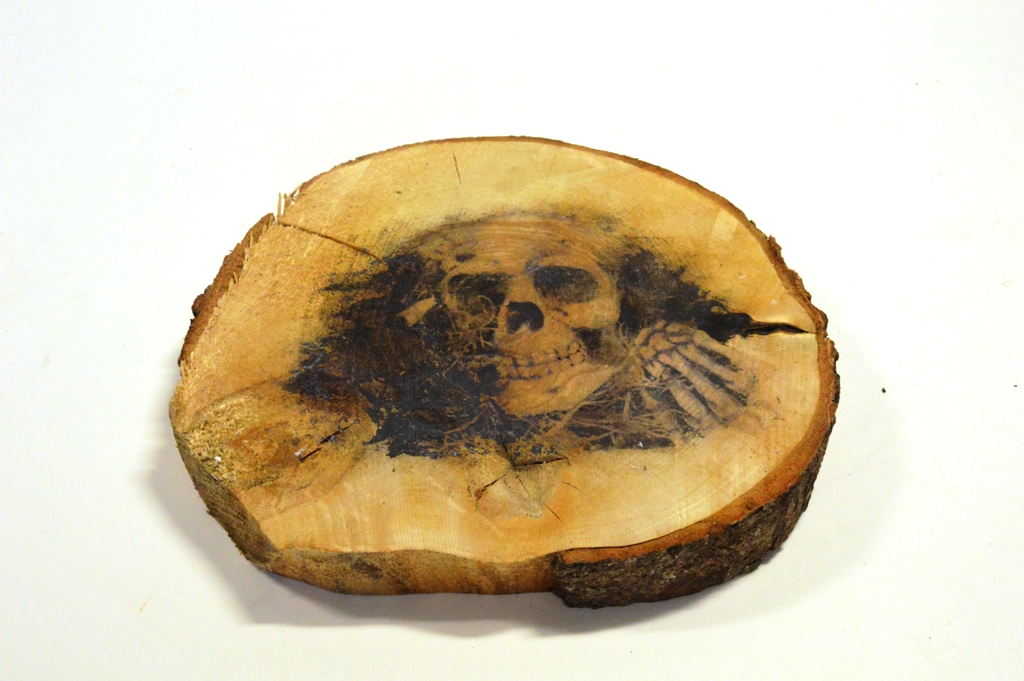
I love using this technique. Laser printed transfers really add a warn, vintage look to your image and you can transfer your images onto most surfaces like these wood slices to create a Spooky Halloween Wall Plaque. Just remember to use a Laserjet printer instead of an inkjet as the ink from an inkjet printer will not transfer.
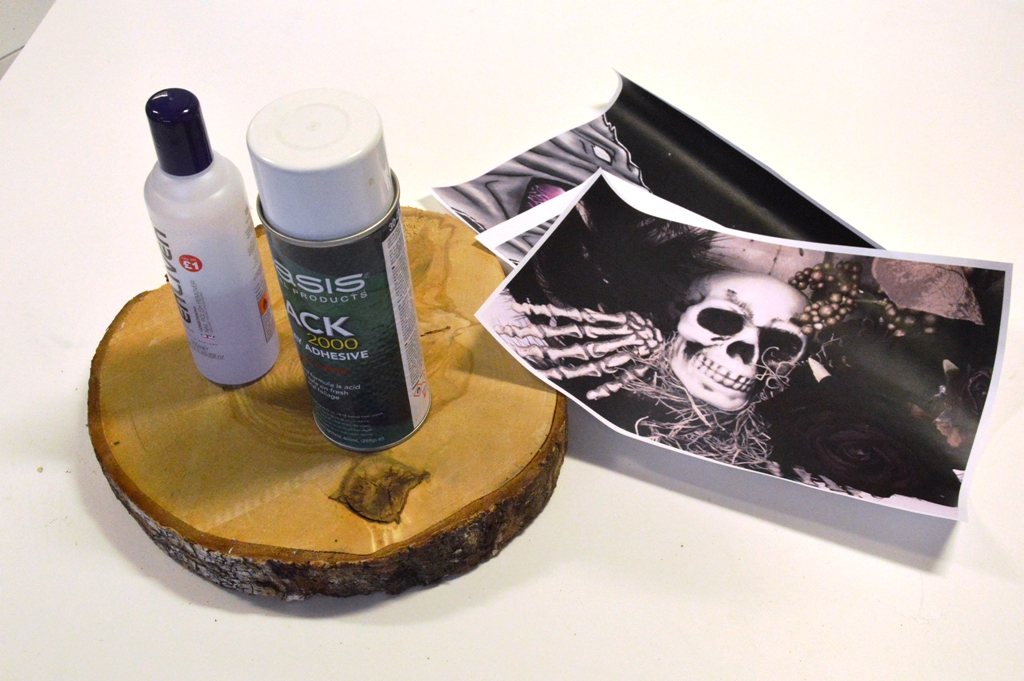
Everything you need:
Natural Round Birch Wood Slice 35 cm
Oasis Adhesive Spray Tack 2000
Handwriting Pen
Nail Polish Remover
cotton wool or tissue
Laser printer (NOT INKJET)
Images
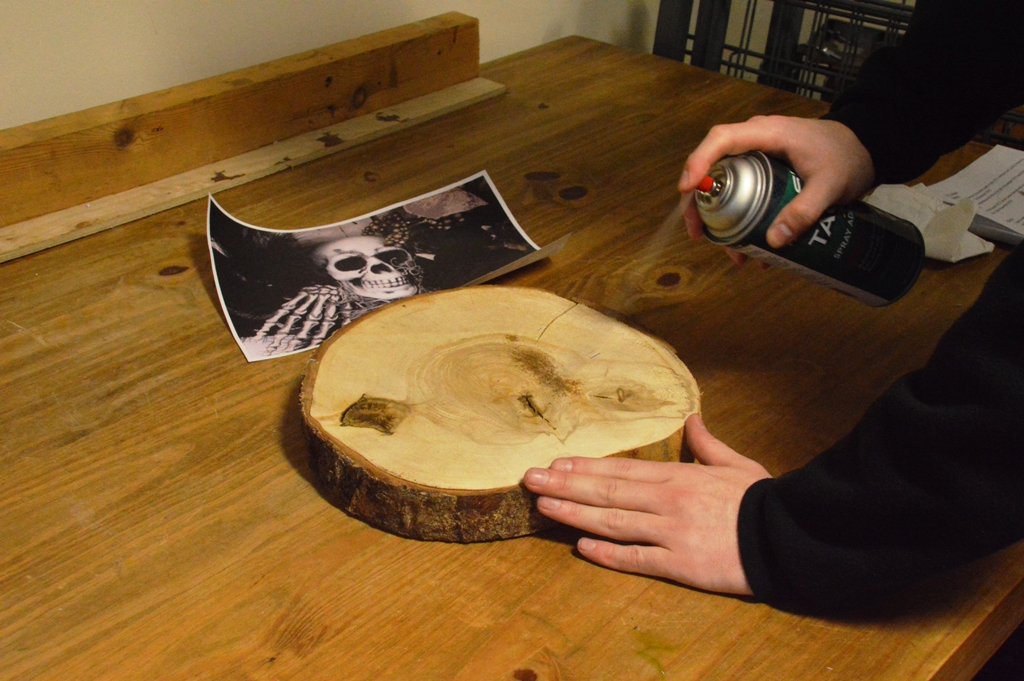
Step One
Prepare the wood slice by Wiping off all the lose bits and dust with a dry cloth. Spray the side you want the transfer to appear with spray adhesive.
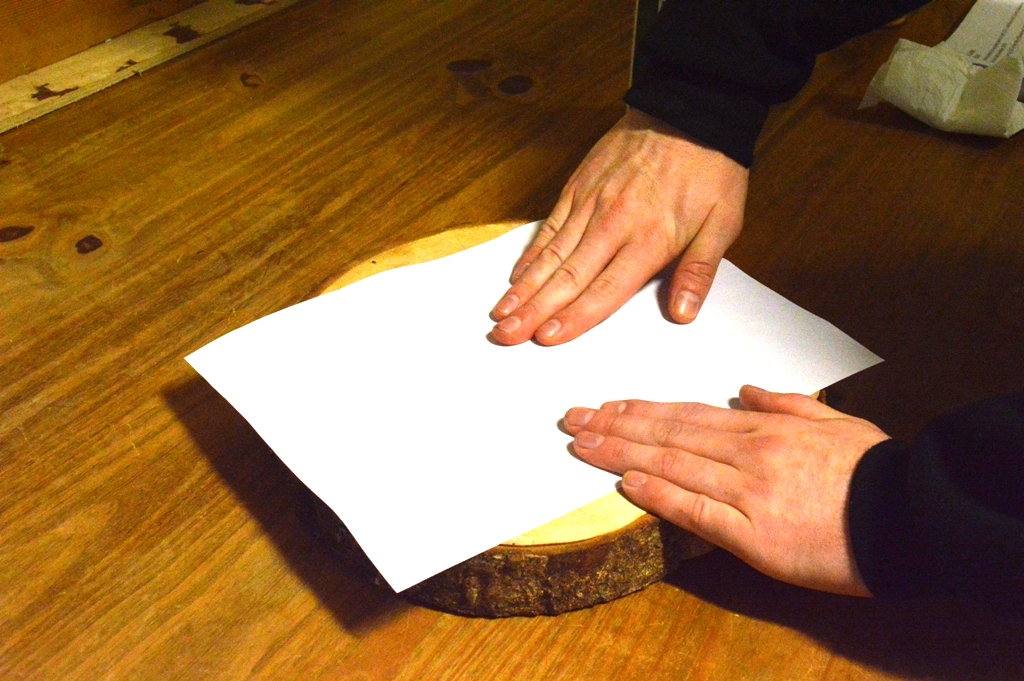
Step Two
Place your image face down onto the adhesive and press down firmly. Leave to dry for one hour.
Step Three
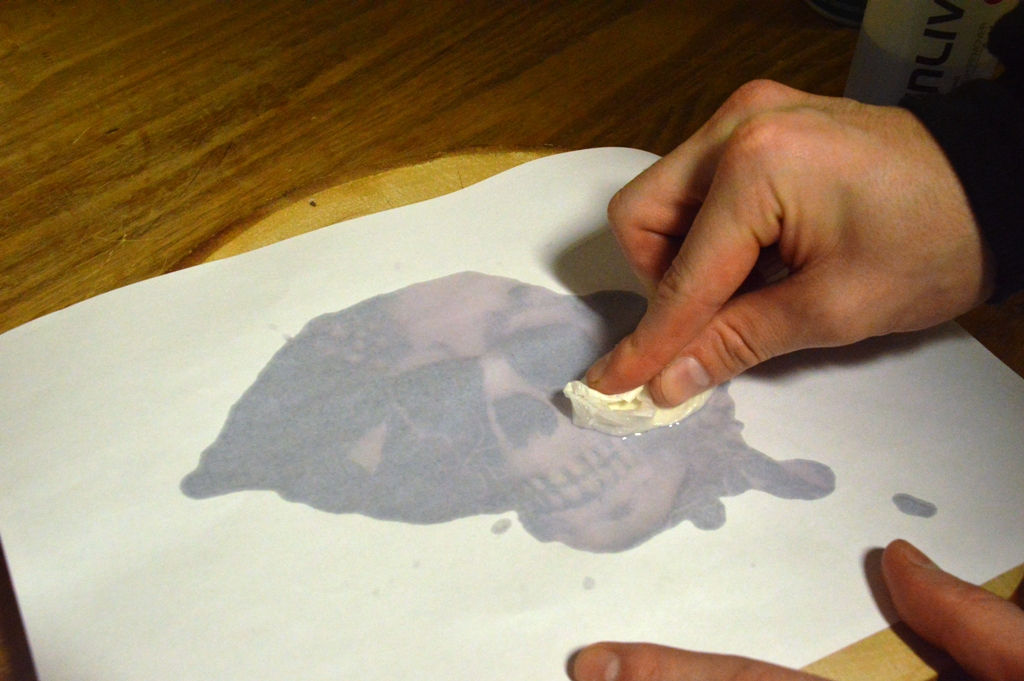
After the adhesive has bonded to the image it's time to use the nail polish remover, soak your cotton wool or tissue in nail polish remover and start to soak the back of your image generously. It will start to turn translucent and you will begin to see the image underneath.
Step Four
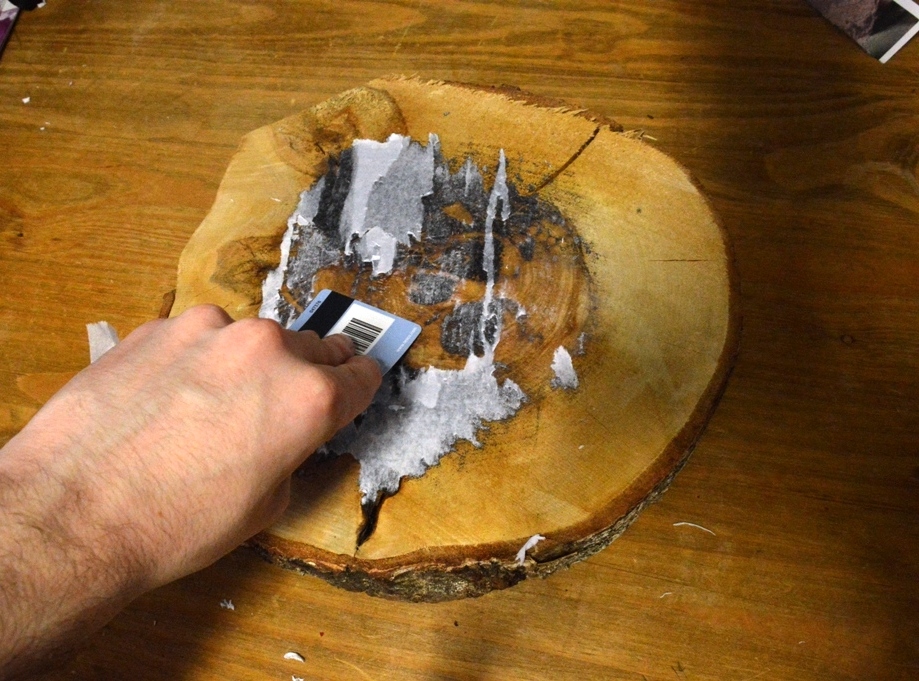
Once the paper is saturated take a pallet knife or card and scrape away all the paper.
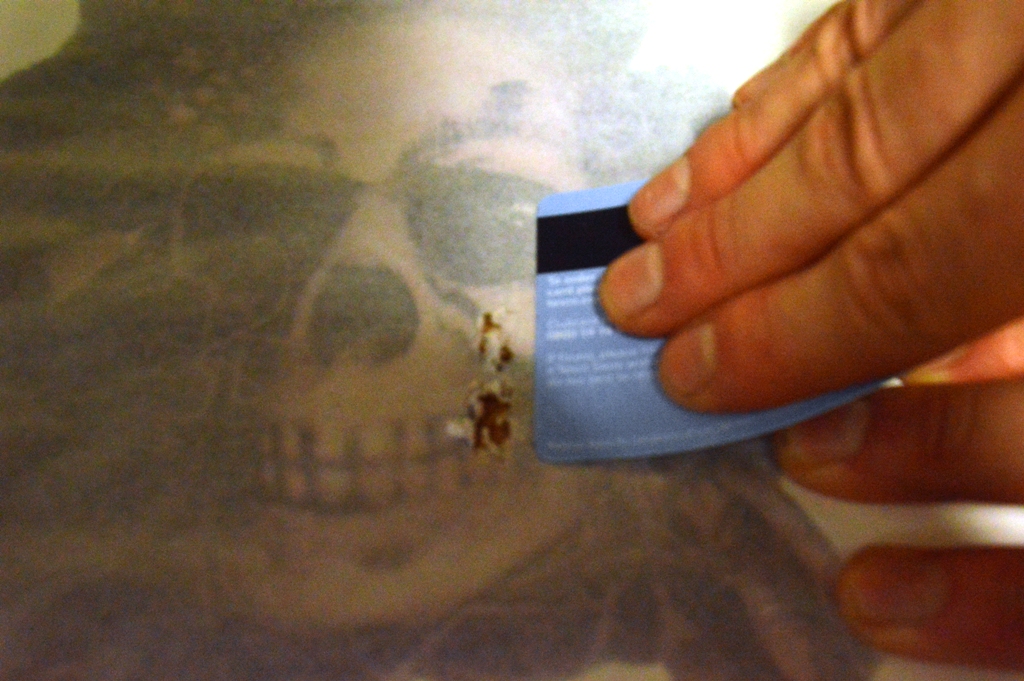
You will start to see the transferred image on the wood. If the paper becomes difficult to remove use a rubbing motion.
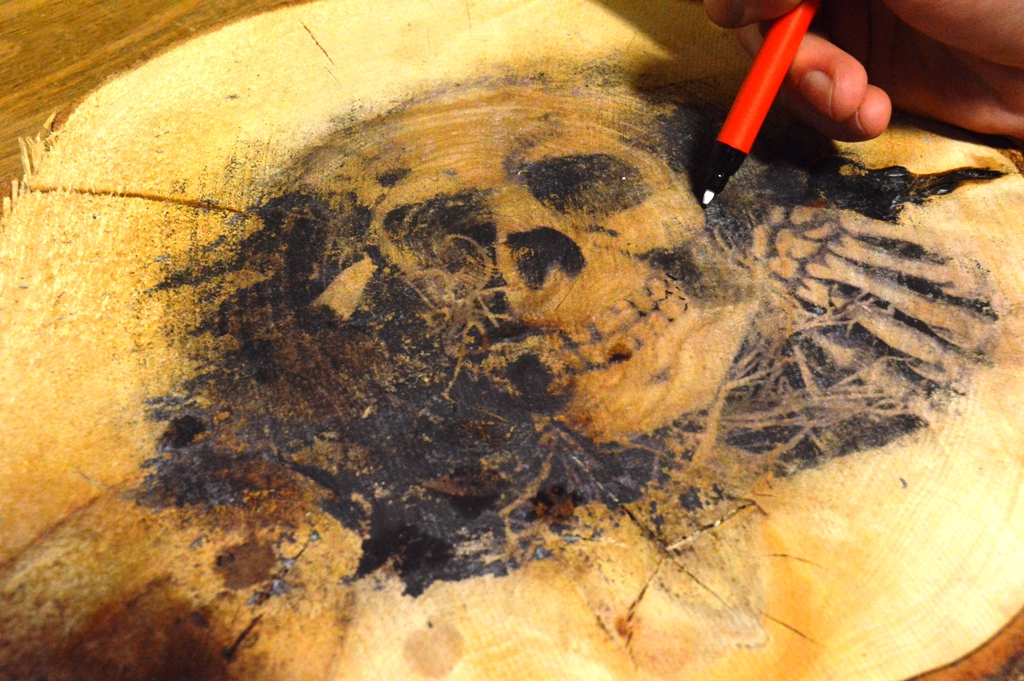
Step Five
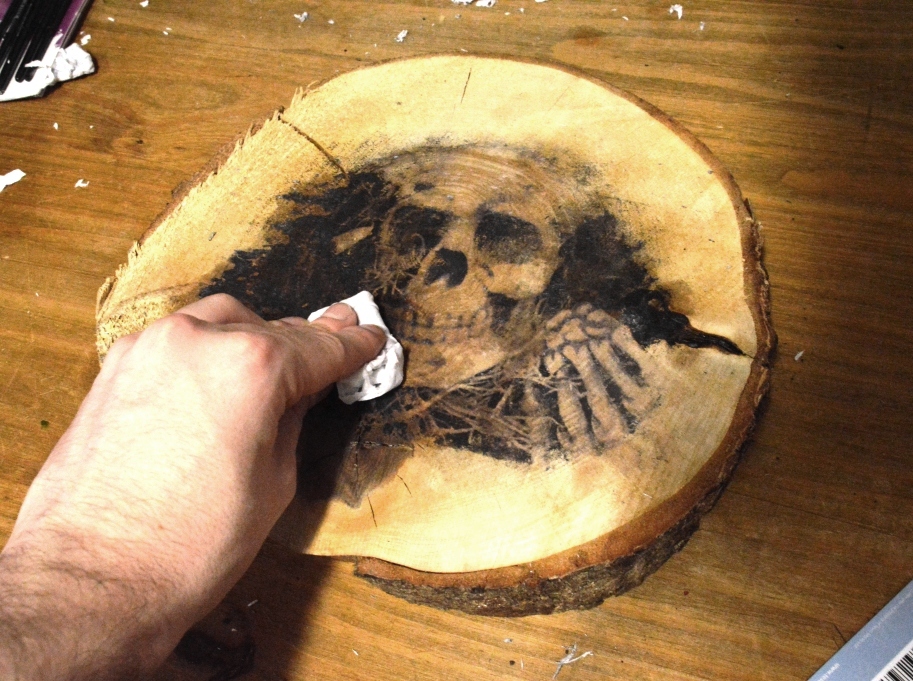
Clean up the transferred image with a bit of water
Step Six
Touch up any parts of the image that you may feel are too faded with a black pen.
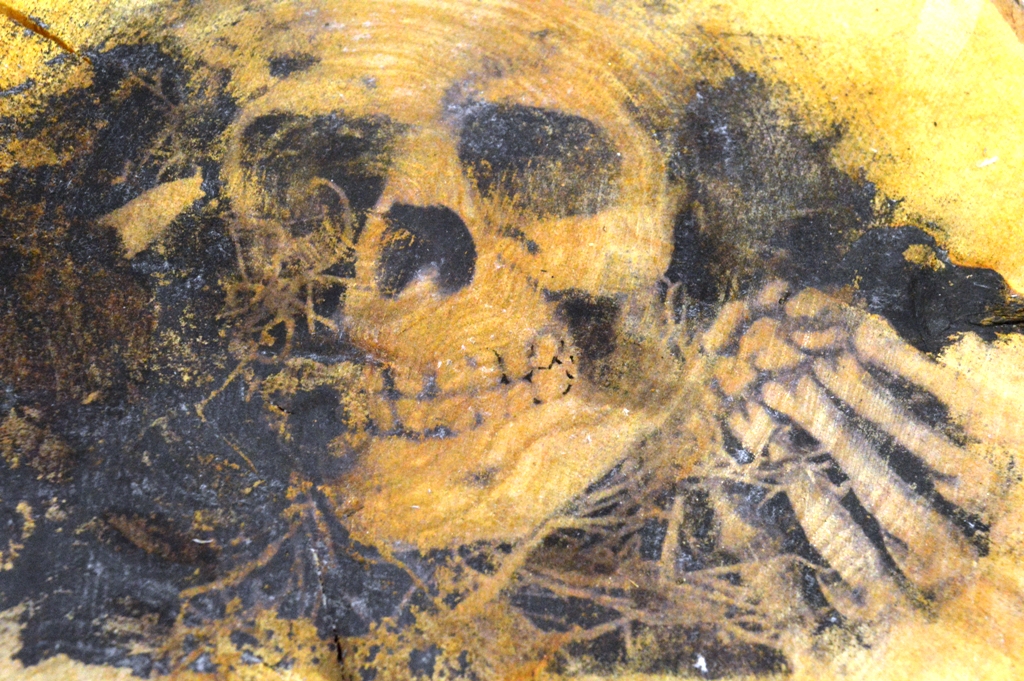
This process is really effective for creating something that is a little different. Especially at this time of year with Halloween and Christmas almost upon us.