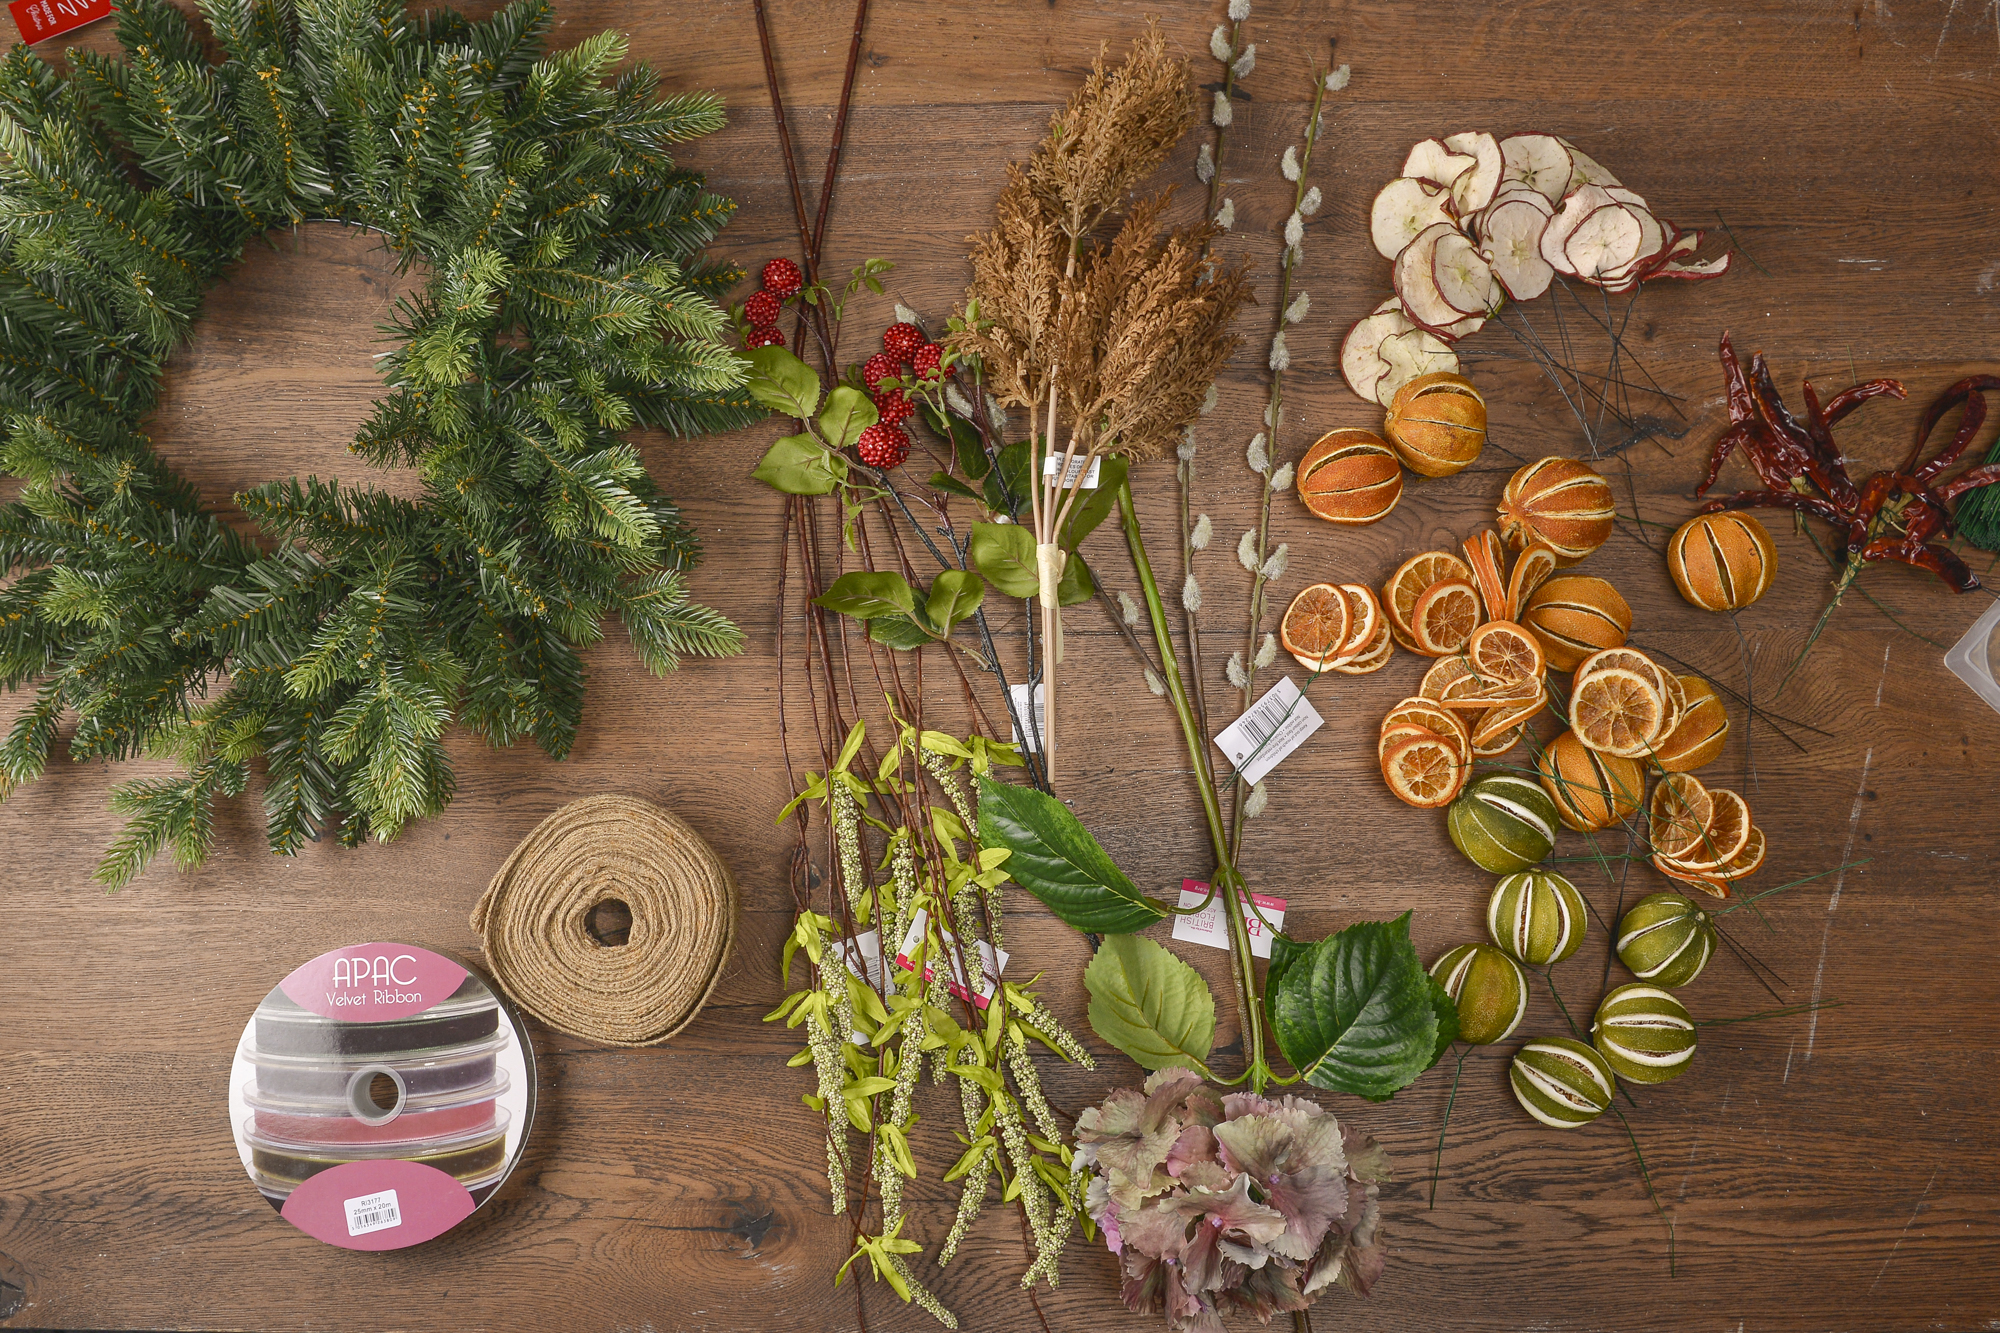
Are you looking for a fun way to spruce up your front door this festive season? This stunning dried fruit wreath is a great way to transition between Autumn and Winter.
You will need:
- Plain Green Wreath 50cm (11253605)
- Mulberry Spray 65cm (11238268)
- Pussy Willow Spray 100cm (874246)
- Hydrangea Dusky Pink 74cm (11042377)
- Cattail and Leaf Spray 104cm (884047) x 2
- Dried whole Orange 250g (DF4052)
- Dried Orange Slices 250g (DF4051)
- Dried Whole Green Oranges (DF4058)
- Basic Red Apple Slices (4274)
- Dried Red Chillies 200g (DF4055)
Step 1.
To start - lay out all your equipment in front of you. This will make it easier to find what you’re looking for.
Step 2.
Once you have everything laid out in front of you, take the stems and cut off the excess (leave a little extra as you can always trim more if needed)
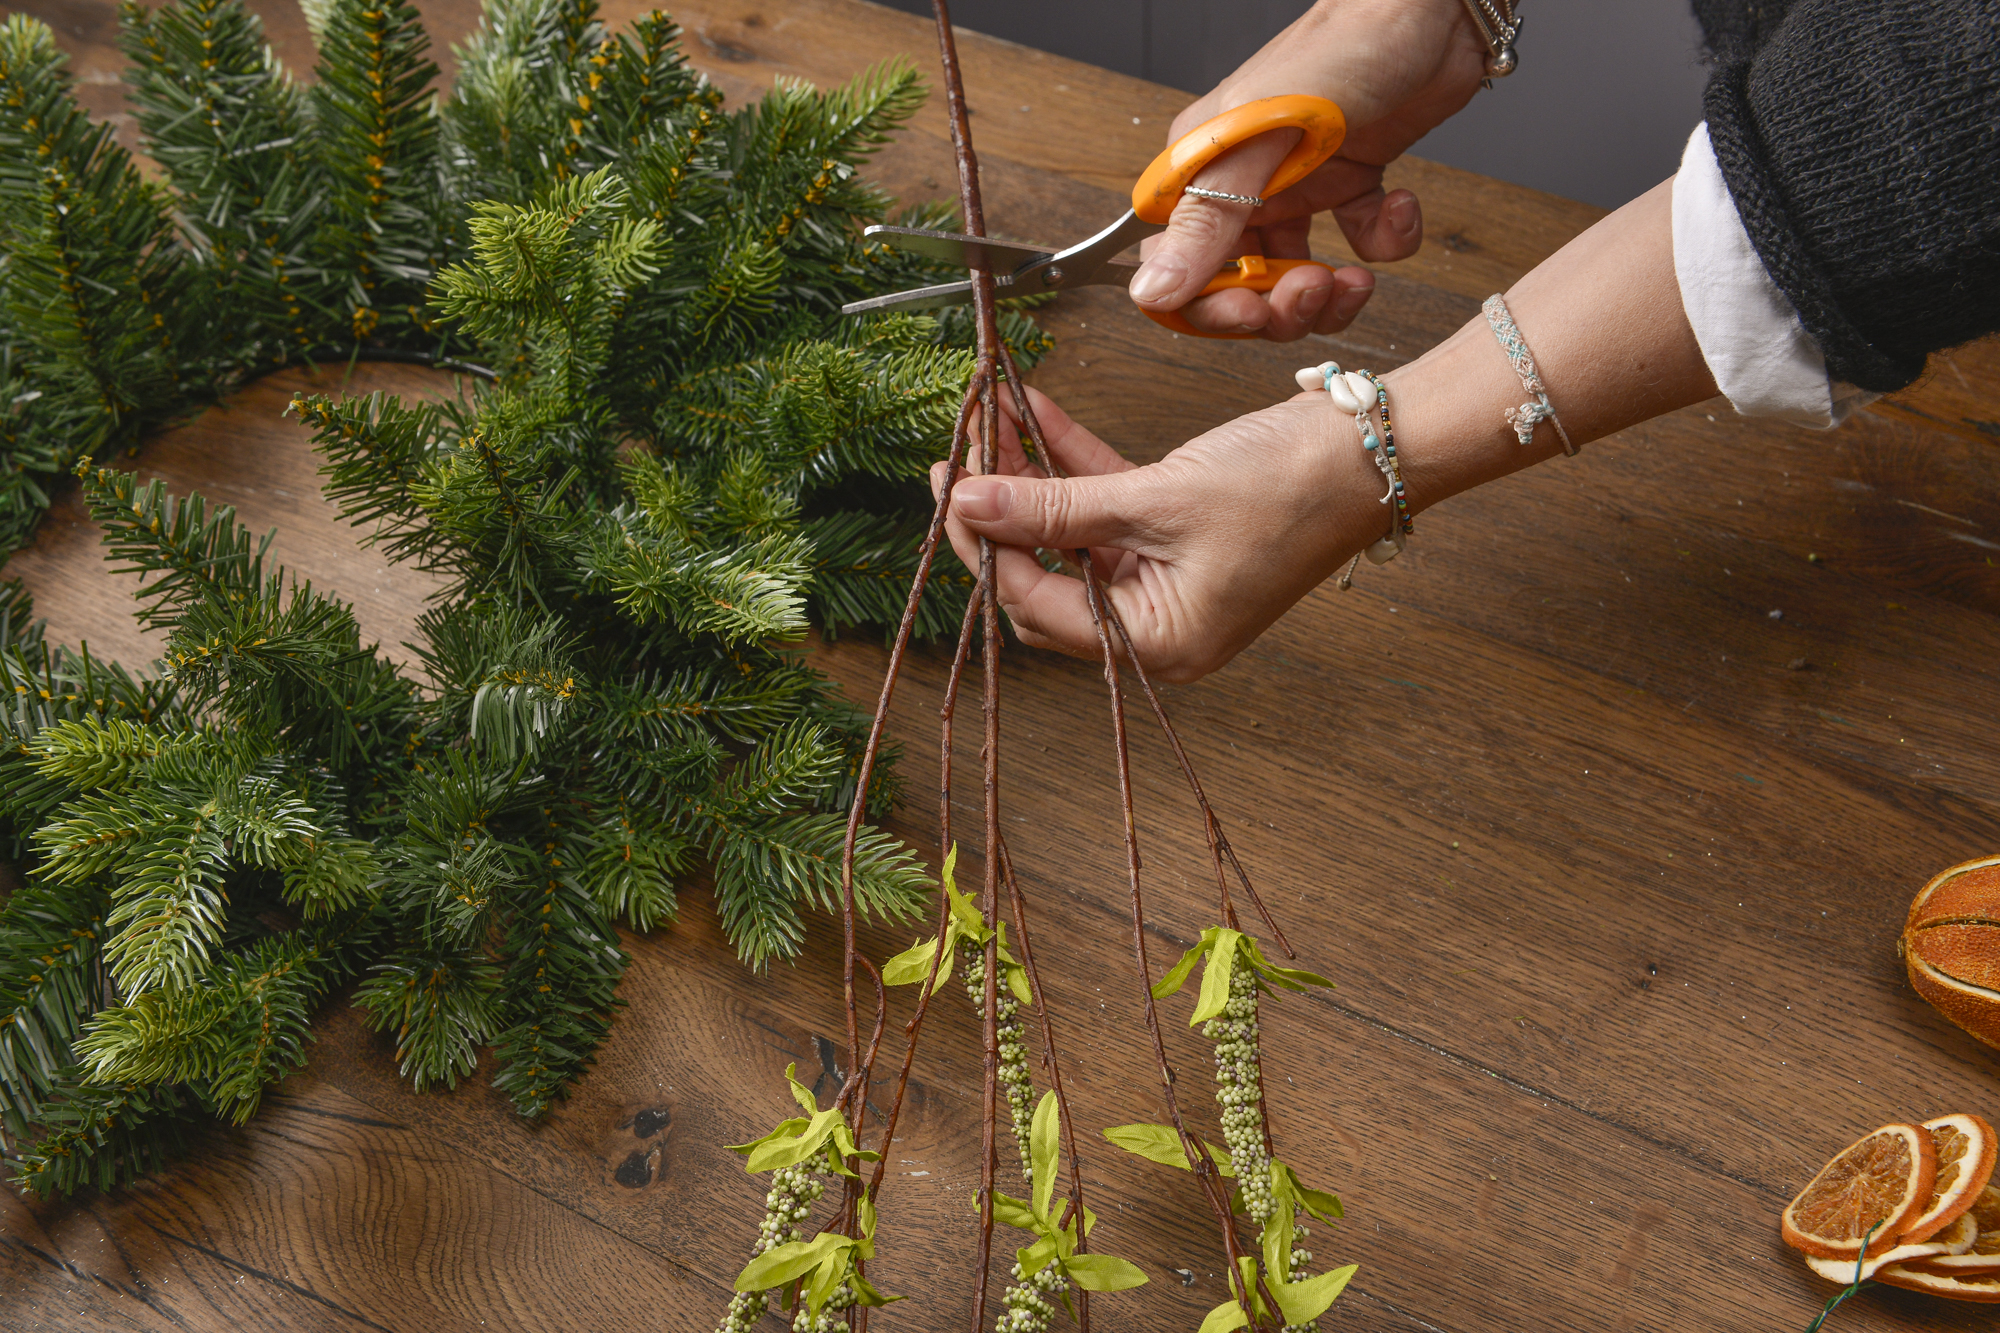
Step 3.
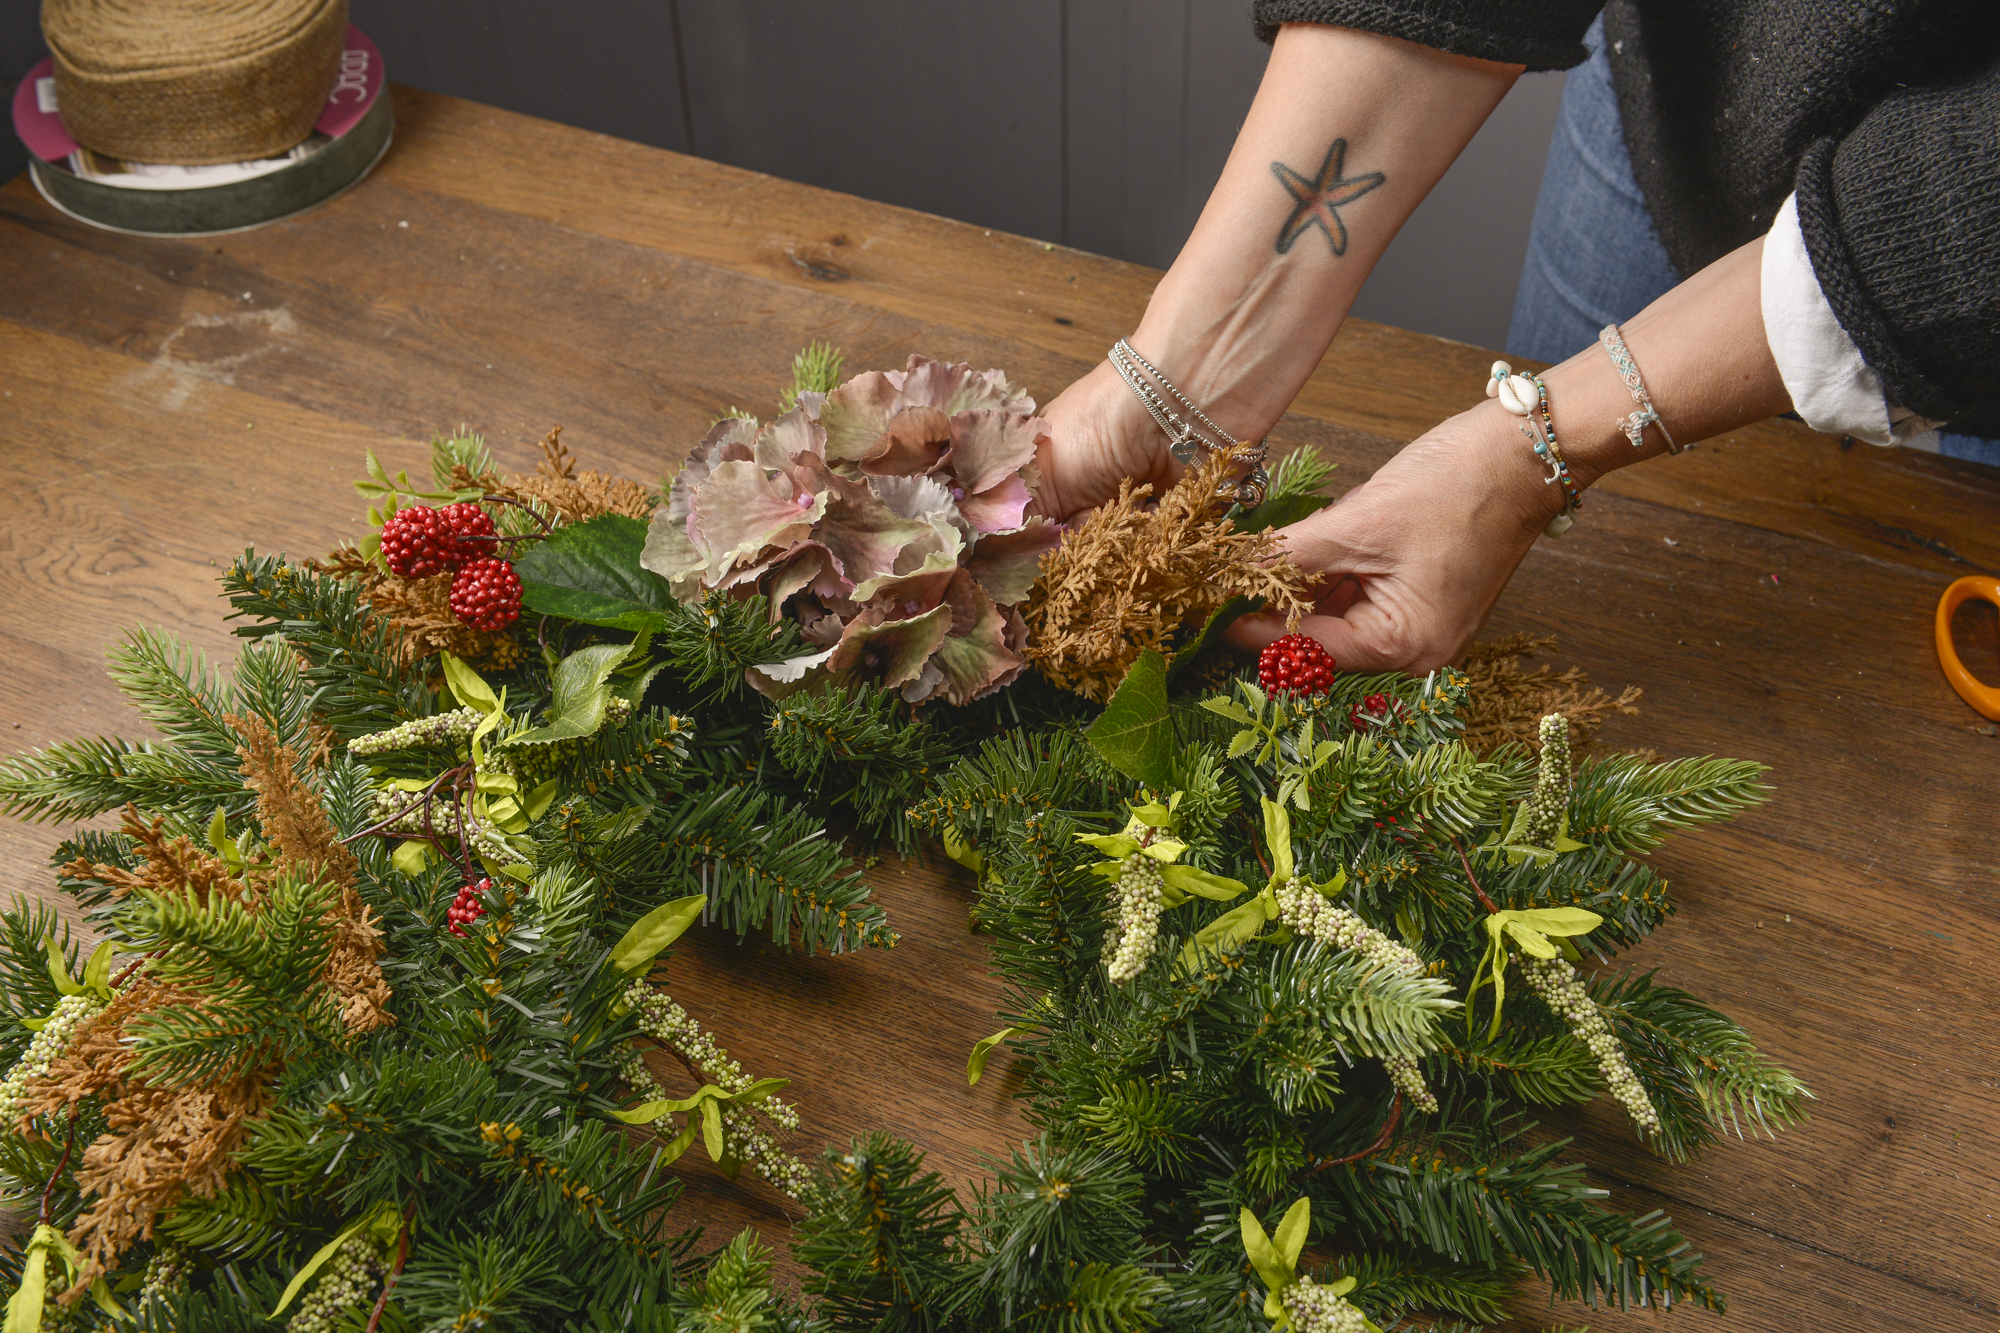
Once your stems are all a similar length, you can start poking them into the wreath in a placement you like. If it feels like they’re loose or might fall out, take some stub wire and tie the stem to the wreath.

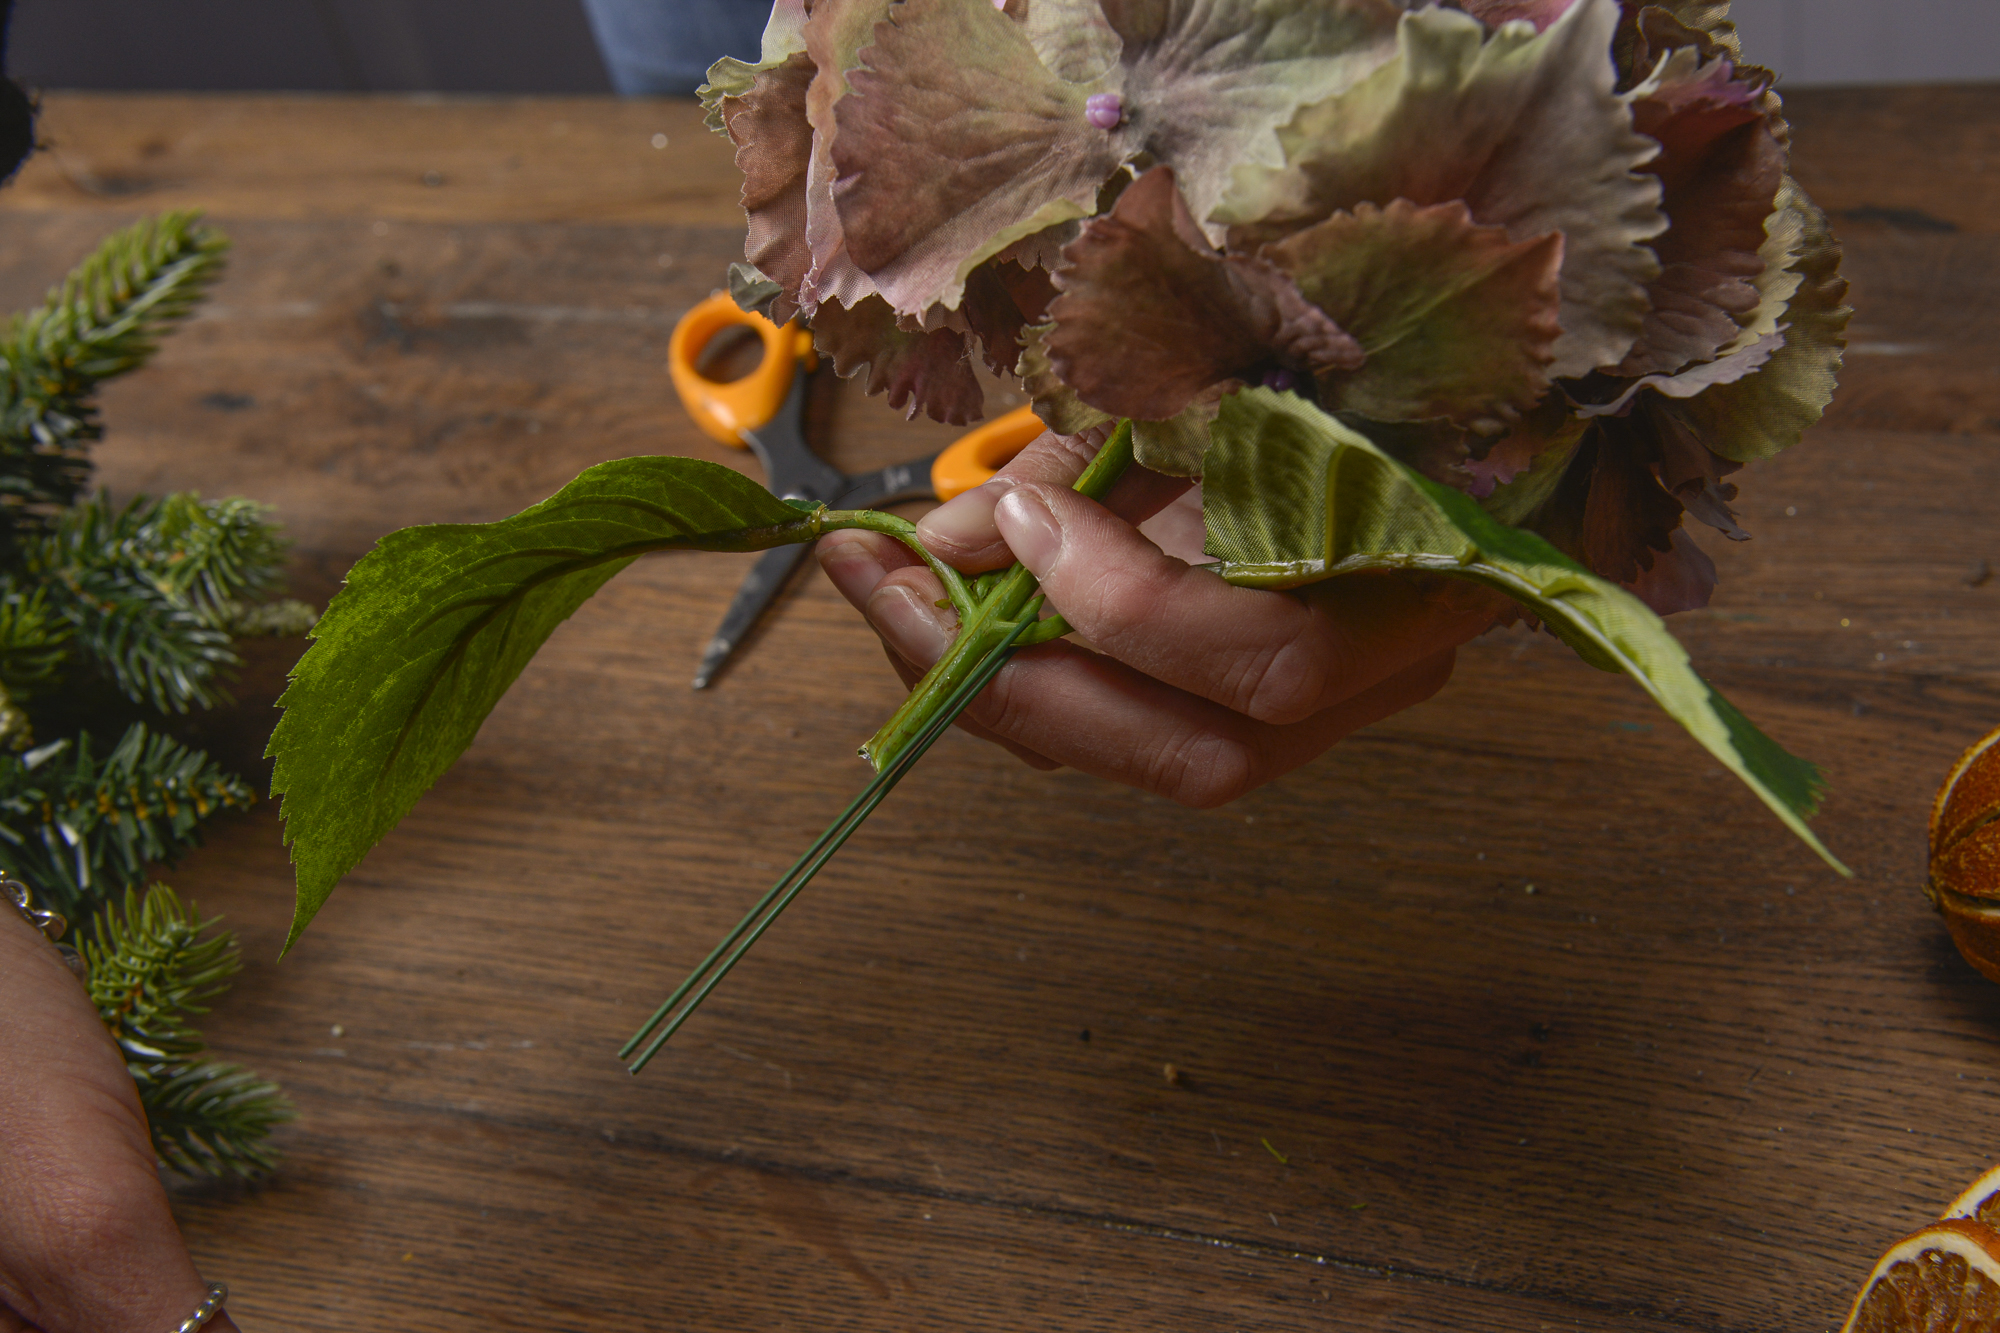
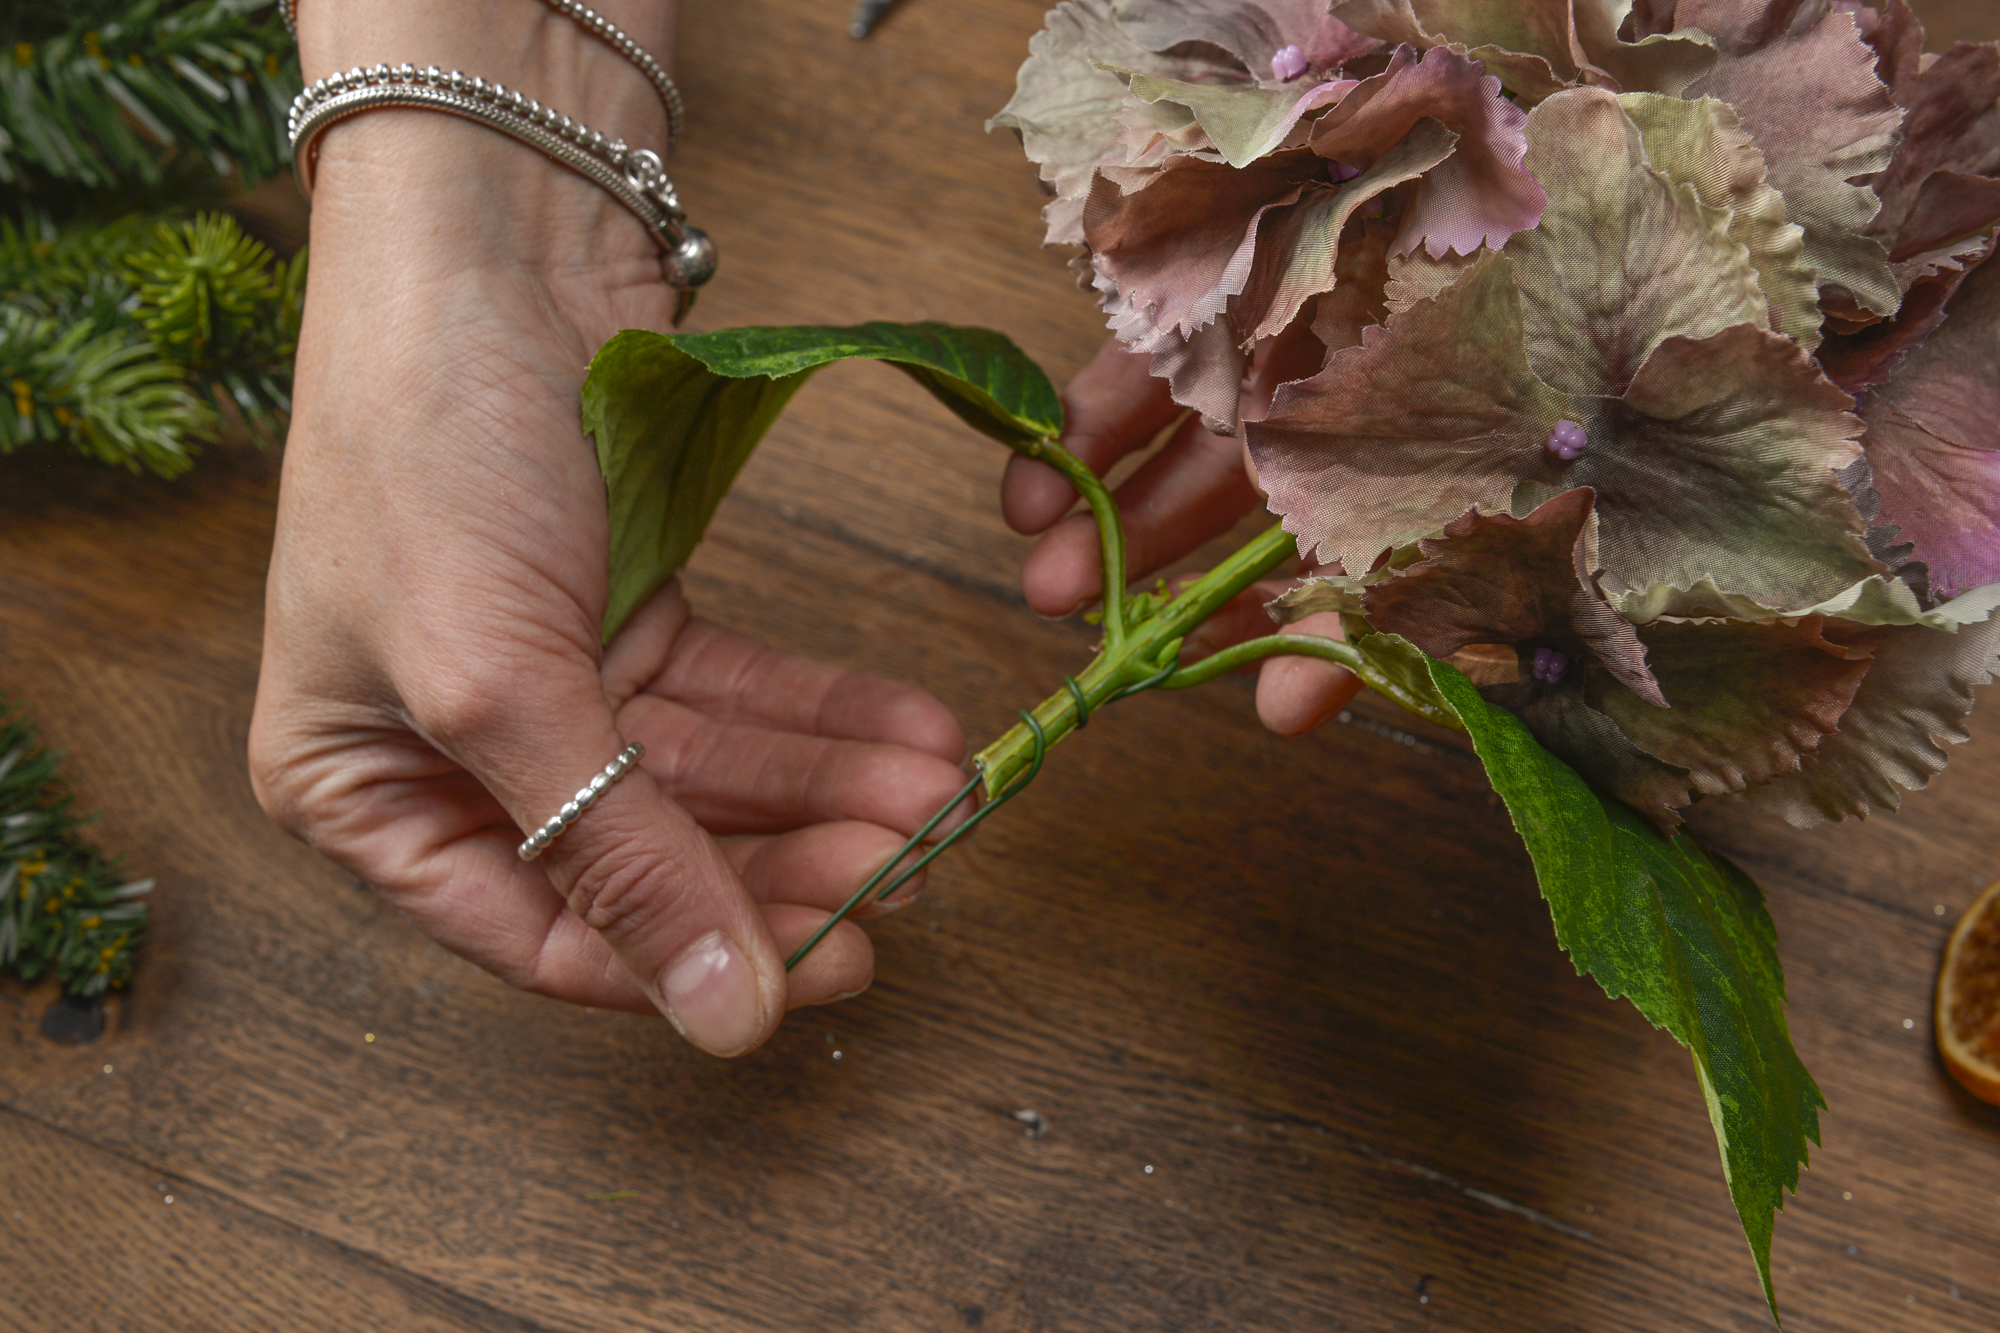
Step 4.
Once you have arranged the stems, take your flowers and wrap stub wire around them. This will allow you to place the flowers wherever you like.
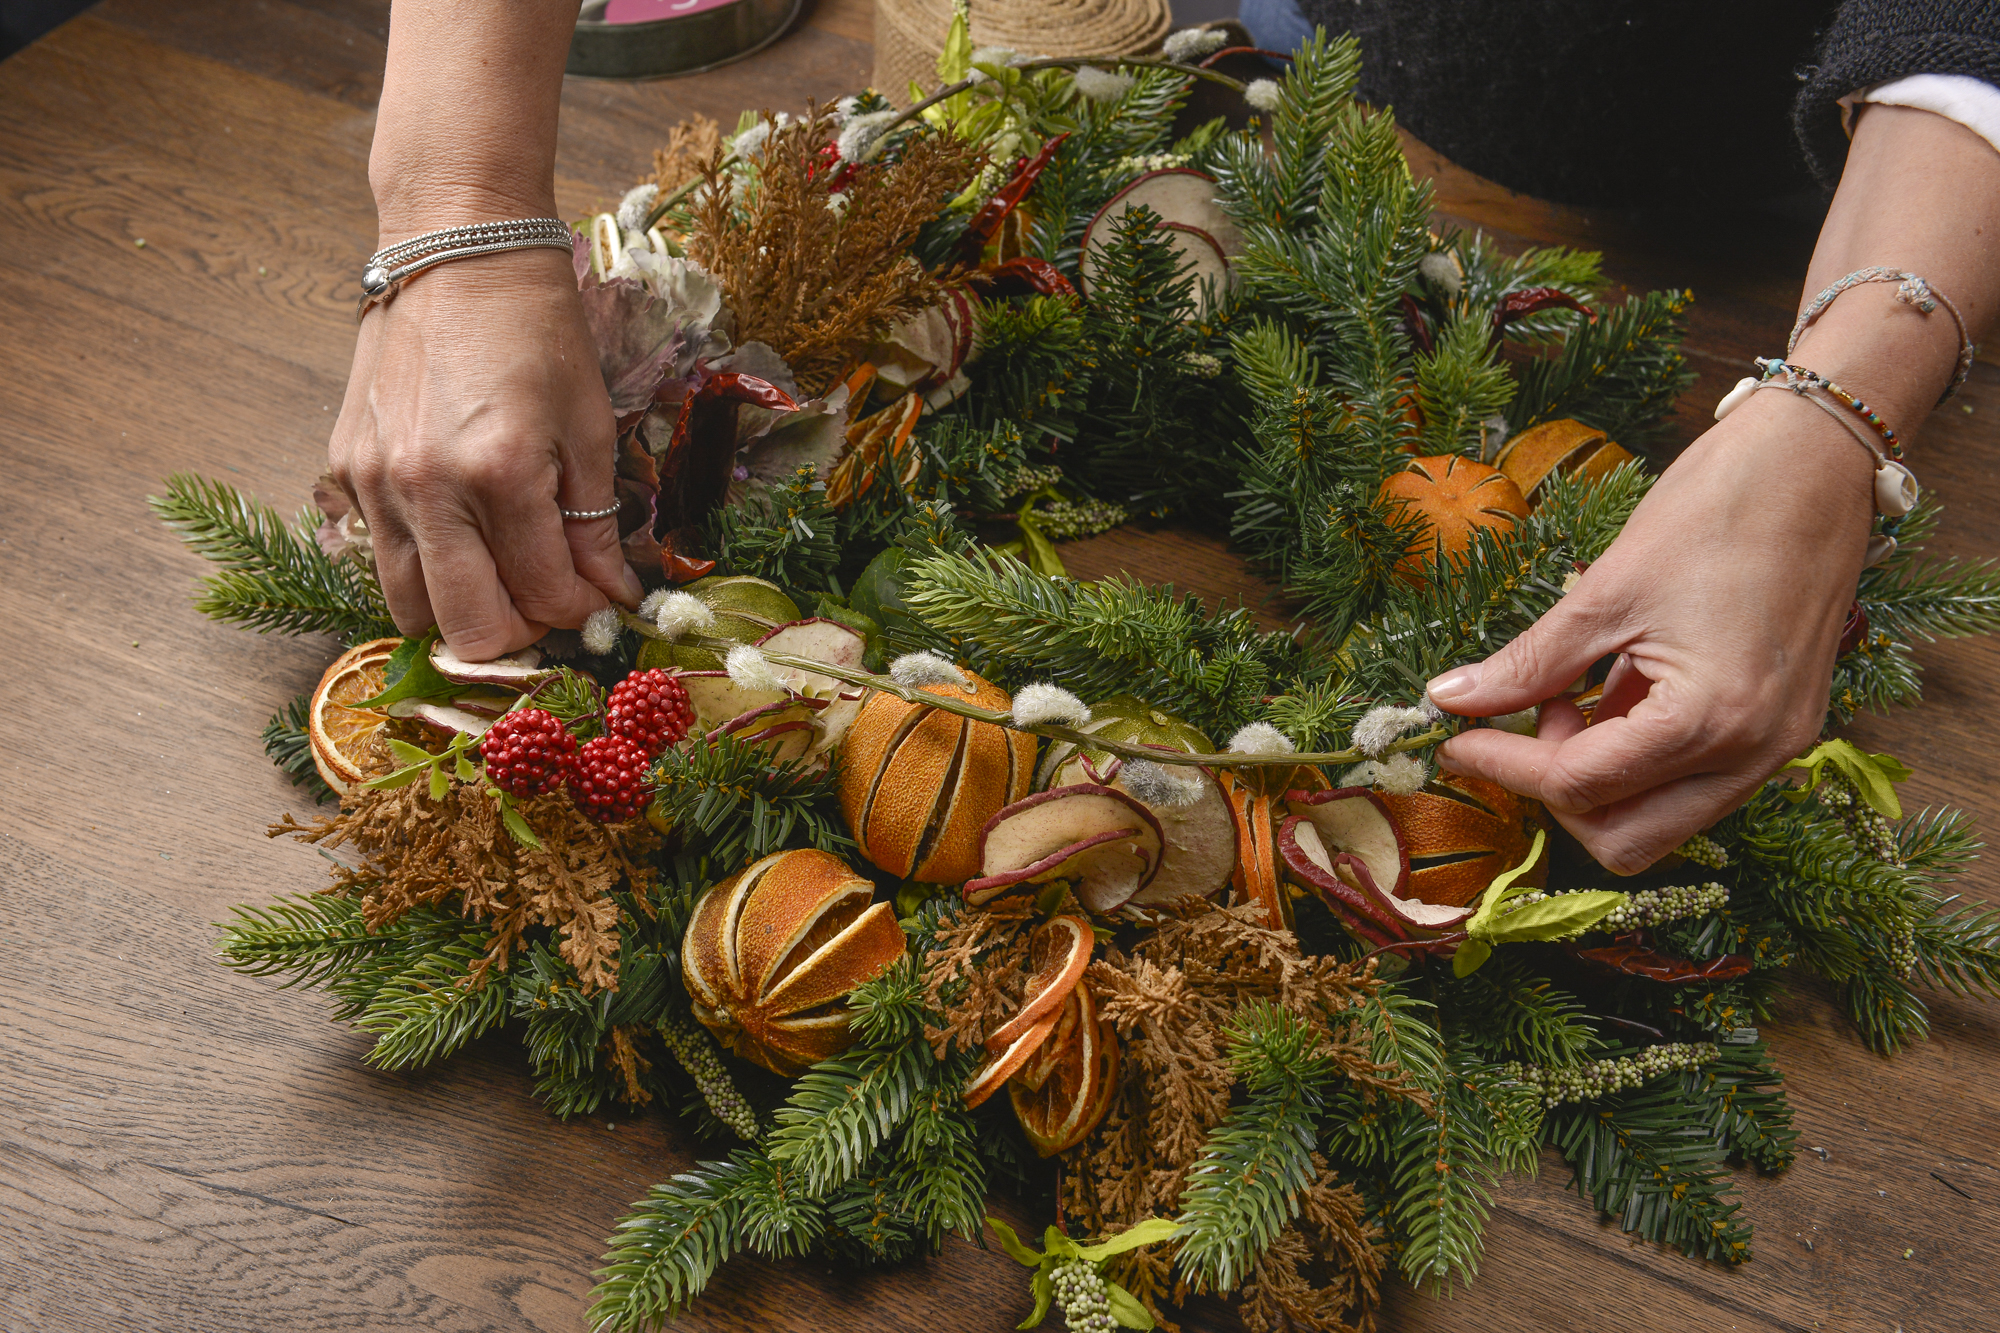
Step 5.
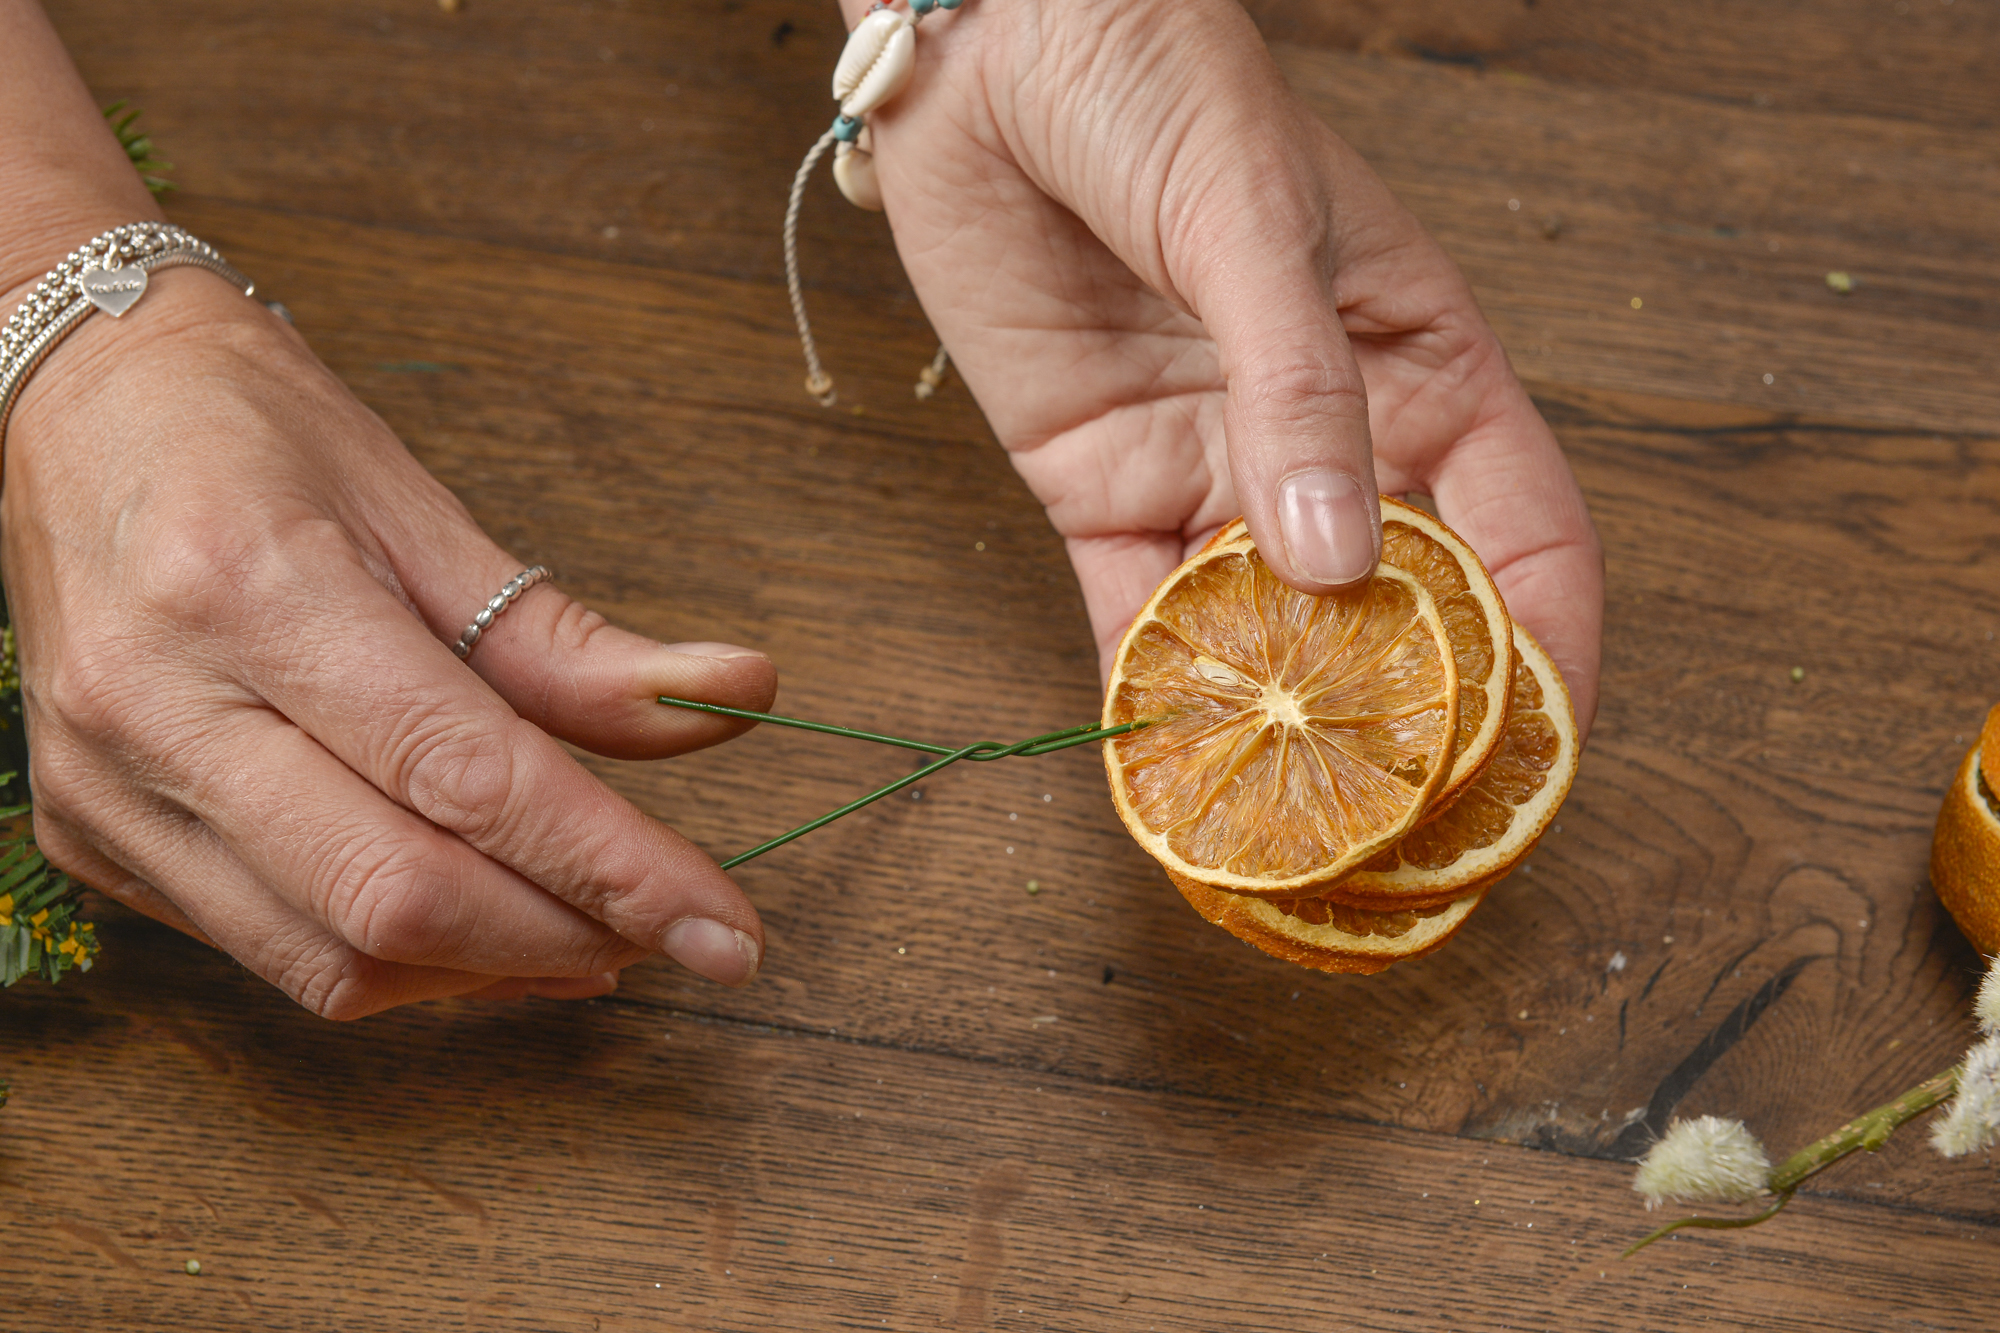
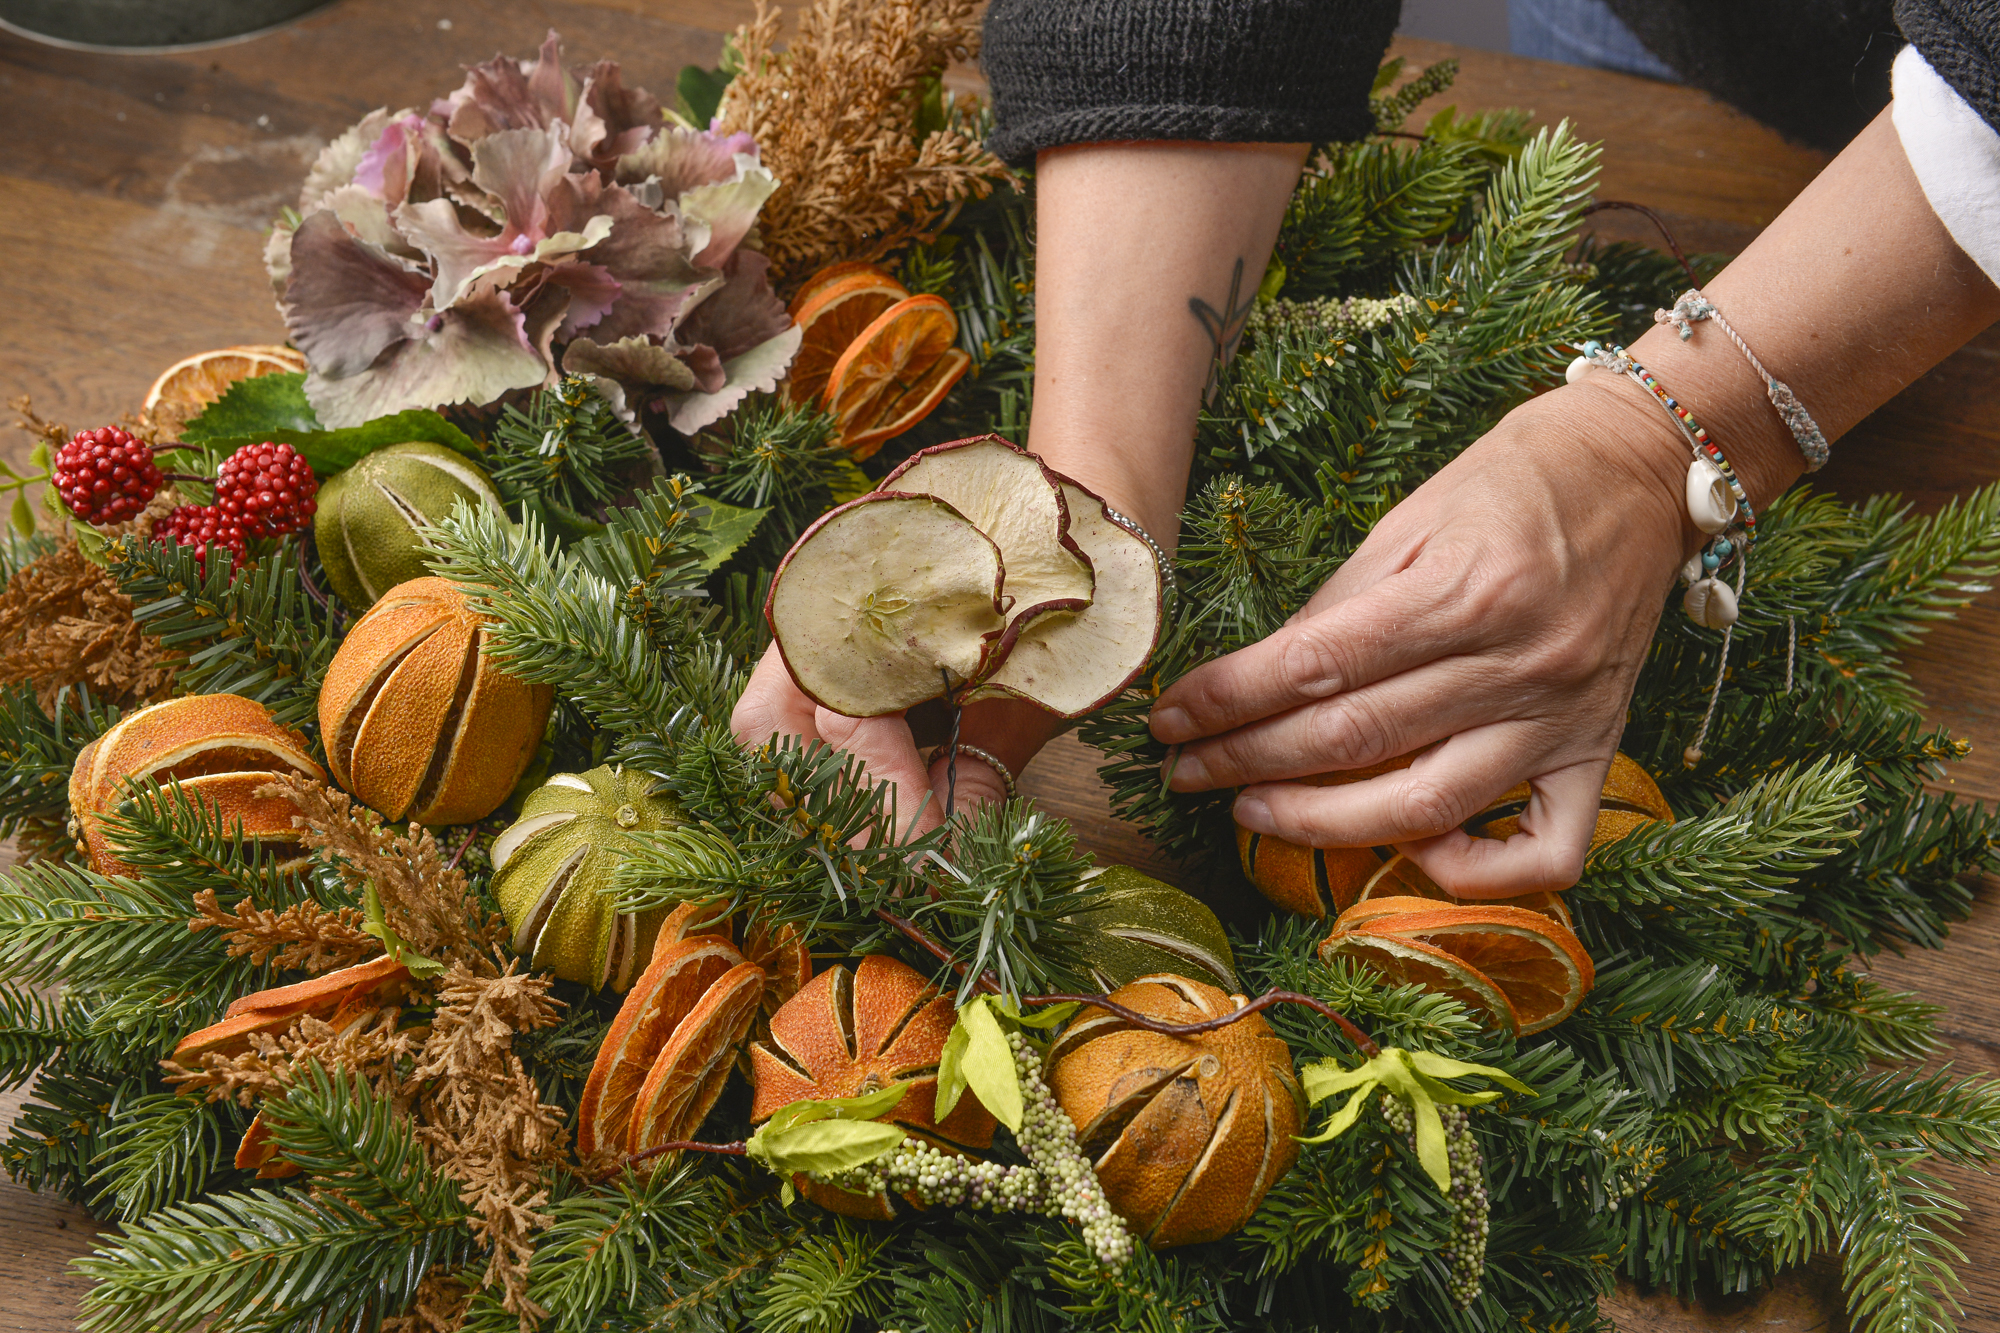
Once you have the flowers in an arrangement you like, go in with the dried fruit stems. These need to be trimmed and stub wire can be used to hold them in place.
Step 6.
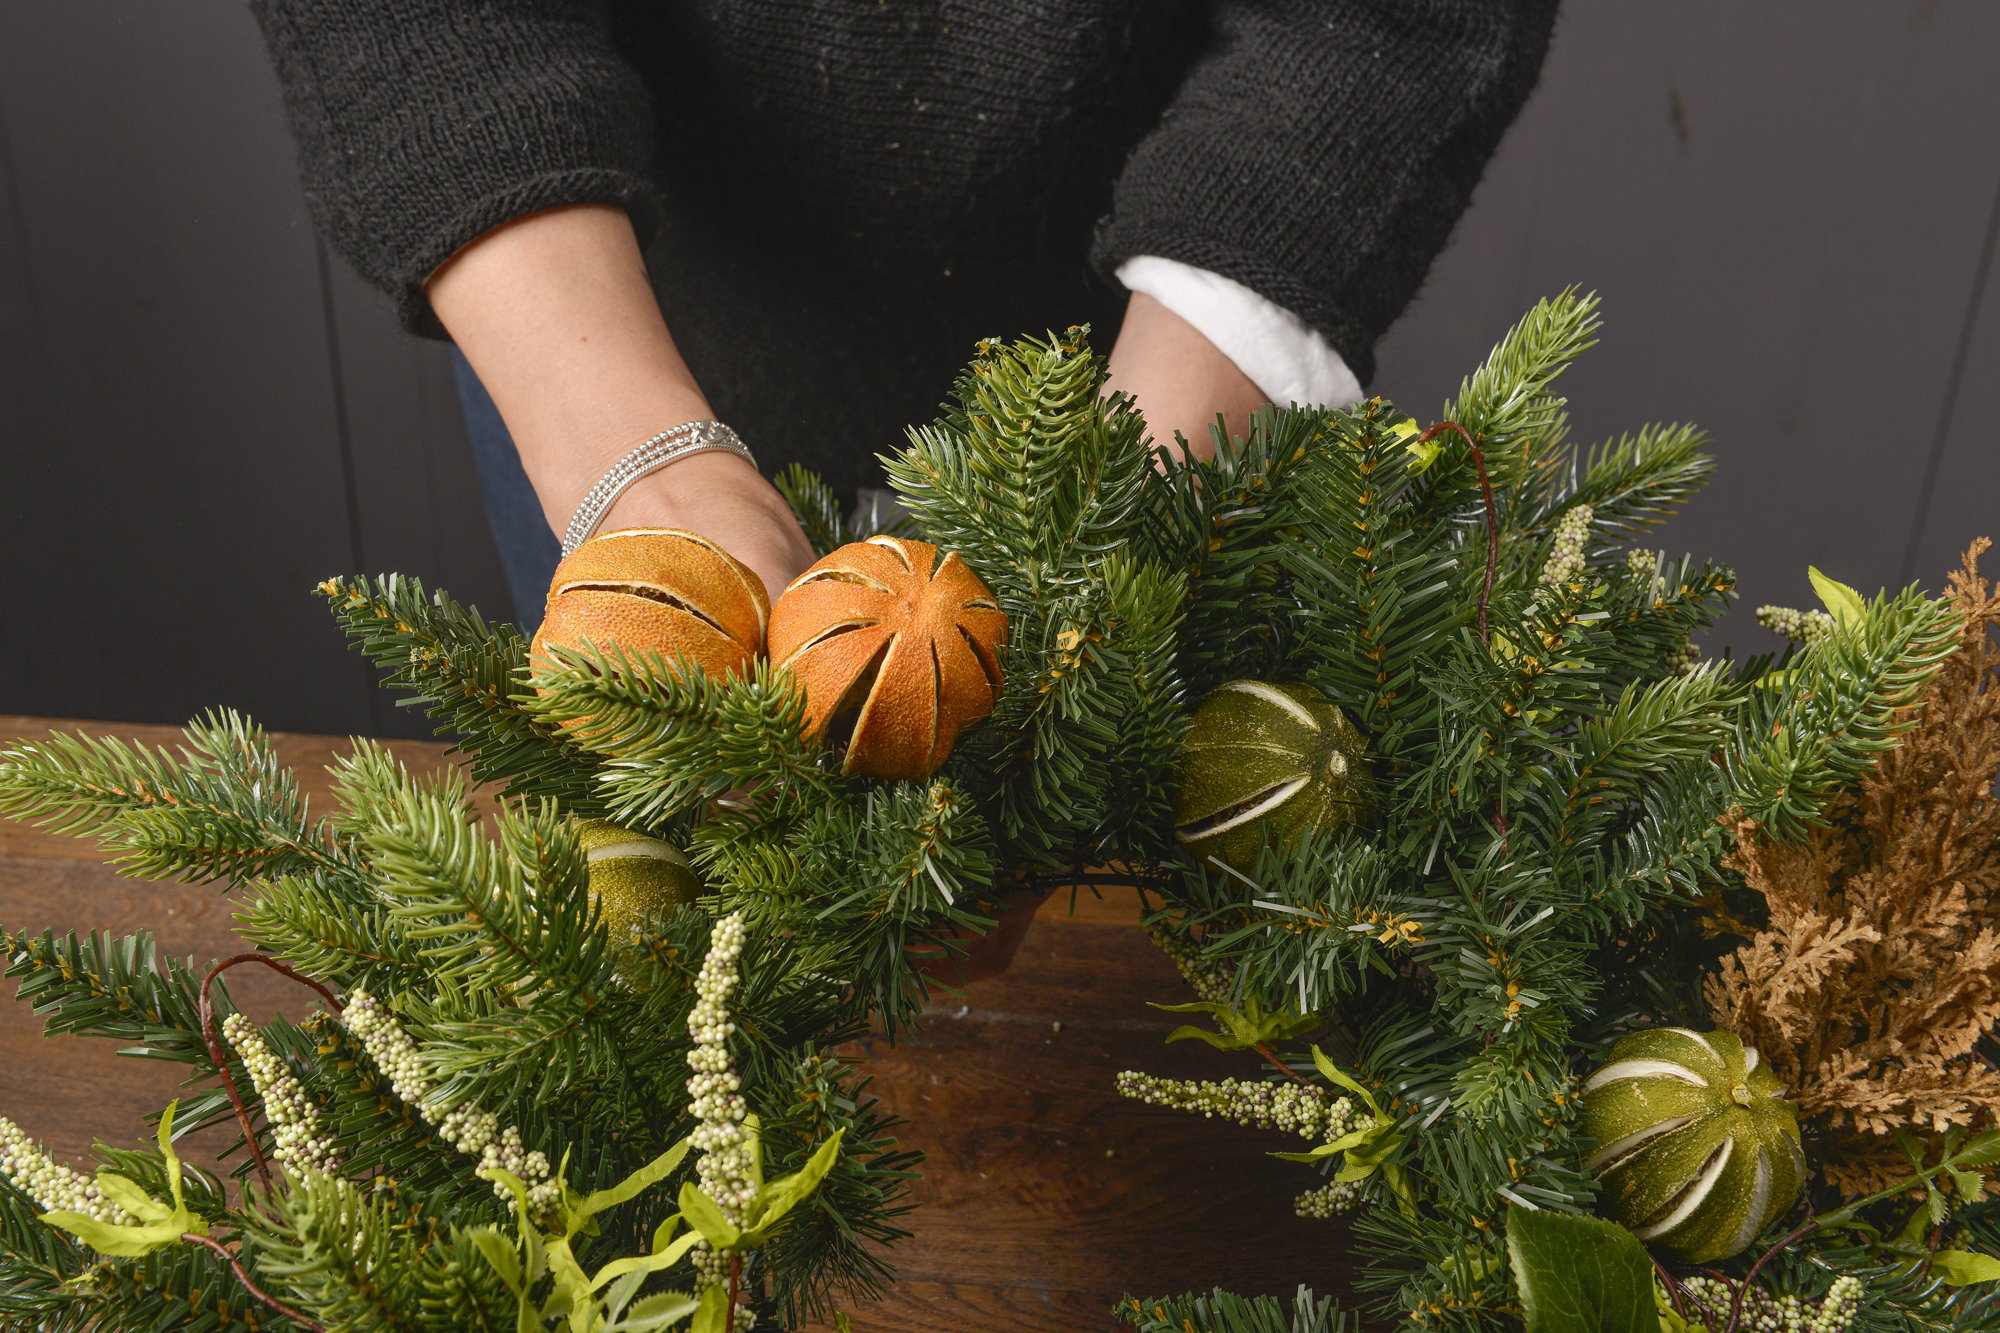
Take the dried whole oranges, thread stub wire through the centre and twist to secure. These can then be added to the wreath and tied in place.

Step 7.
Position your fruit in the gaps and when you’re happy with the way it looks, secure using the stub wire.
Step 8.
Take the pussy willow branch and lay this over the wreath. We won’t be tucking this in, just securing it in place with stub wire.
Step 9.
The final step in creating this stunning dried fruit wreath is the bow. A beautiful bow really brings the whole piece together.

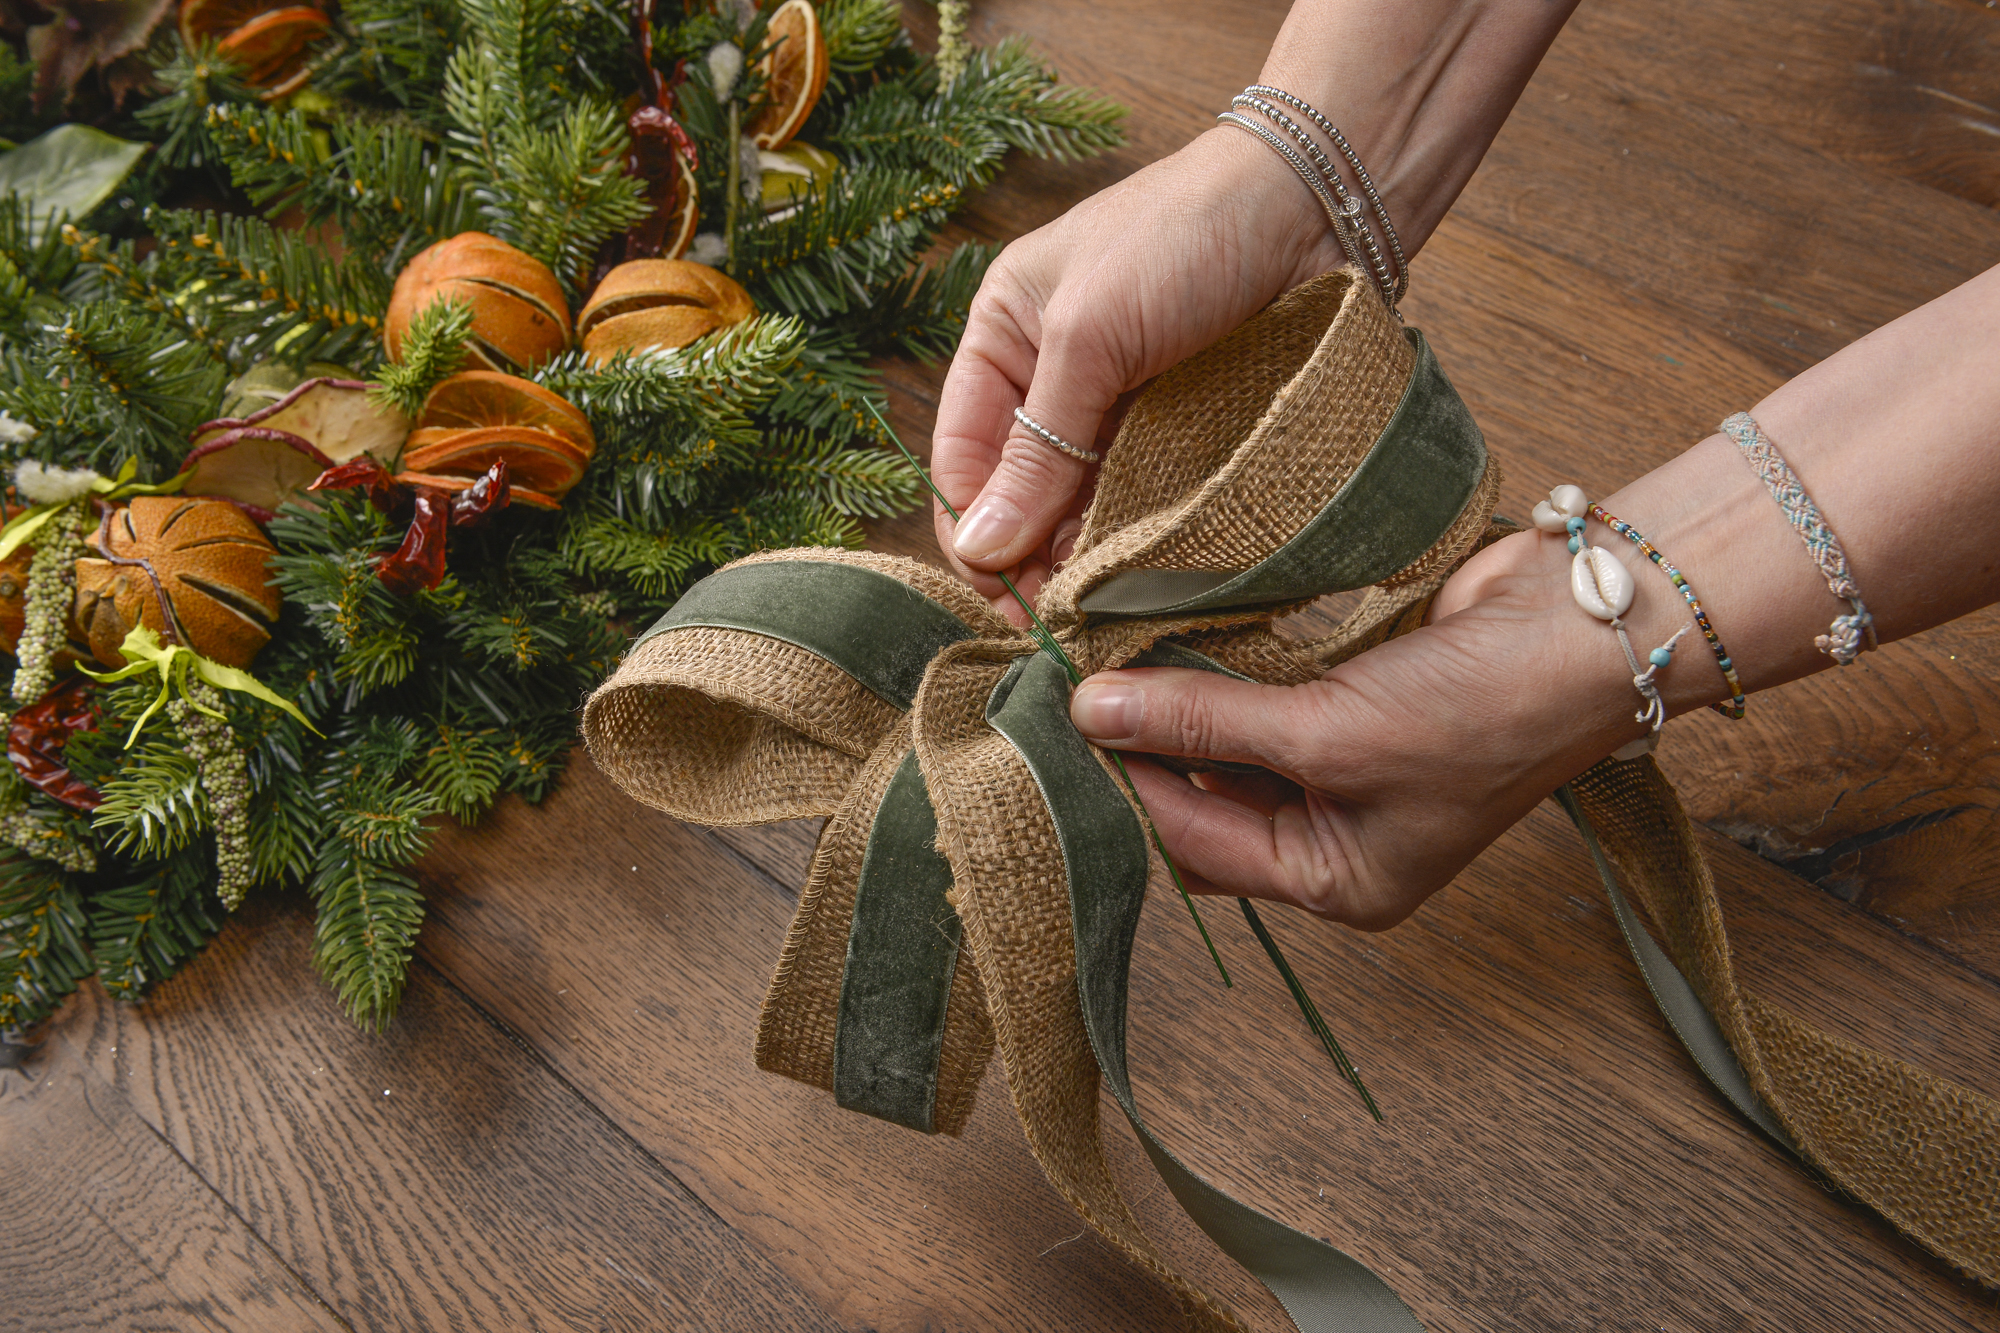
Tie your bow in place and ta-dah! You're done.
