Do you love pumpkins as autumn/Halloween decor but loathe the act of carving a scary, yet somewhat wonky face and scooping out the never-ending insides? If you answered yes, then ta-da - we’re here to help.
These DIY painted pumpkins are absolutely adorable and the best part, they’re super easy to do. We’ve put together a fool proof, step-by-step guide to help you achieve pumpkins that will make even the craftiest of queens, green with envy.
You will need:
- Pumpkins of varying sizes and colours
- Acrylic paint (35141)
- Paintbrushes
- Old paper
- Disposable bowl (or paint palette)
Step 1.
Lay out all the equipment in front of you within easy reach. Clean your pumpkin - this ensures a smooth (mud free) base to work with.

Step 2.
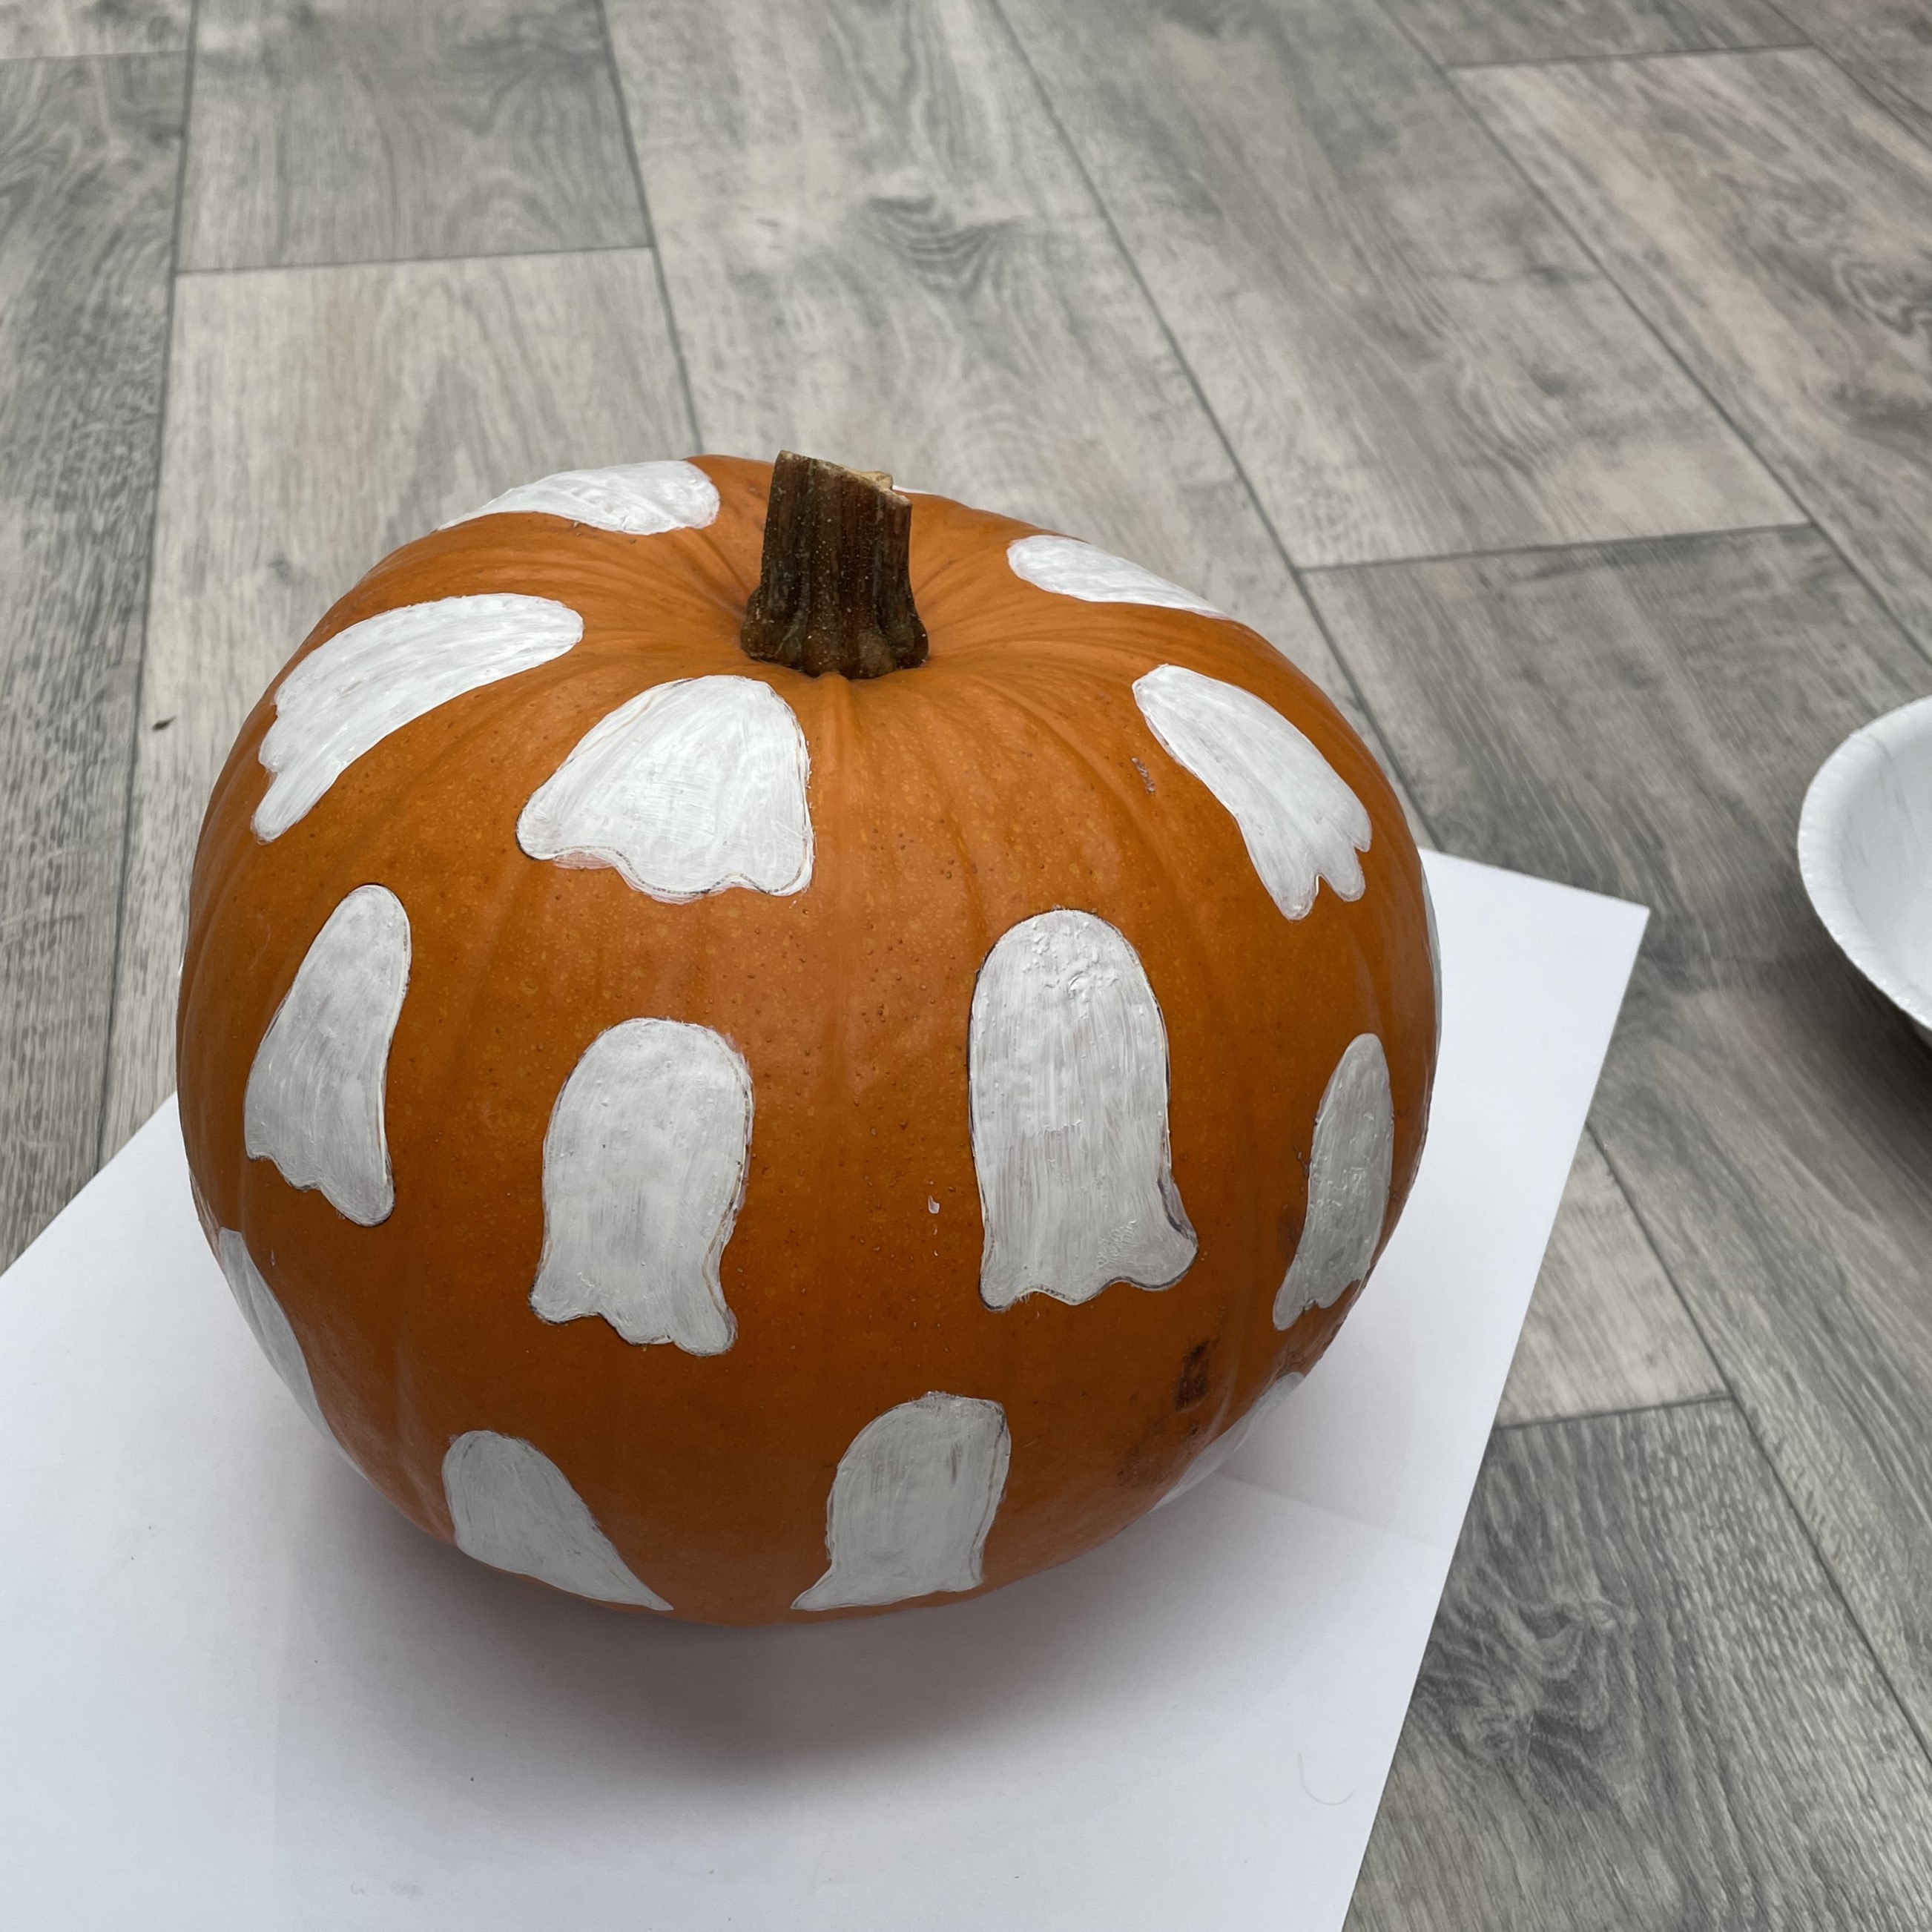
Draw out your design, this allows you to get the spacing right meaning your pumpkin will look great from every angle. Squeeze your paint into the bowl being careful not to mix the colours - we don’t want grey ghosties now do we..

Step 3.
Using a brush size relevant to the size of your pumpkin, take the white paint and carefully fill in your outline. You will probably need to do 2-3 coats depending on the viscosity of your paint. Make sure to leave each coat to dry thoroughly to give the best result.
Step 4.
Once you’re happy with the white and it has fully dried - use the end of your paintbrush (without the bristles) and dip this into the black paint. This will create a circle, the perfect size for the eyes and mouth. Dot this onto your ghosties and leave them to dry.

And you are done... Don't they just look ahh-mazing??
